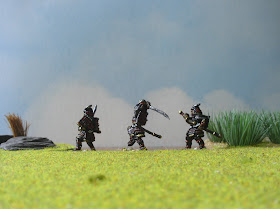
Yesterday kicked off the supposed reign of the Great Captain Alexander of Macedon. After the disappointment against the Greeks, Philip II died and was succeeded by his fiery son Alexander, who has already been wounded severely in battle once. He decided to vent his spleen on the pesky hillmen of Illyria. I won't do a deployment map for this one - it was pretty straightforward. A massive attack on the open right by the cream of the cavalry, with phalanxes attacking the steep hills in the centre and lots of light troops masking the left. Alexander went in frontally against inferior cavalry and got hammered - all of the Companions and Thessalians went down with him. Occasionally a game happens where terrible dice by one side are matched by brilliant dice on the other, and this was one such night. Alexander's glory boys couldn't hurt a horse fly while the Illyrians went through their opponents like a hot knife through butter. That's now twice that Alexander has been badly wounded.
We had a bit of a discussion about how best to portray the Great Commander on the tabletop. In Empire, a Great Captain adds a massive +2 to a D6 roll, but we felt that simply giving his forces an extra one-third points was too much - they would never lose in a figure game with such disparity. Plus, it wouldn't be much fun to play. So Gordon came up with an idea borrowed from Napoleonics: the Great Captain adds a morale level to all troops within an 8" radius. And if he is removed from play, all units within 8" drop to a level below their usual and have to test morale. This gave Alexander three legendary cavalry units with which to carve up the opposition - except they couldn't hit a thing. We can't remove him from play because that would upset the balance of the board game, so we ruled that he loses one of his strategic actions while recovering, and another empire gets to go.
So, next week it's the Carthaginian landing against Syracuse. Let's see if one of the so-called Great Powers can actually conquer something!
Pages
▼
Wednesday, 30 September 2009
Monday, 28 September 2009
Campaign Musings
There has been an interesting discussion thread on The Miniatures Page about campaigns, started by CorpCommander. There seems to be a consensus that campaigns fizzle out too easily, something I can understand from my own past experiences. I've been through the whole range of possibilities, using board games for the strategic elements, with fully worked out army rosters and so on. The reason I liked Empire as soon as I saw it is that it abstracts all of this. The long turn length is varied by the appearance of great commanders, and there aren't even any armies. What matters is which provinces one controls, and thus which enemy or neutral ones can be reached so as to expand one's empire. We play it at the club, and it doesn't matter who is there on the night. Some players have an affinity for a certain power, and they tend to make the decision as to what that state does when it gets a shot, but apart from that it just keeps generating tabletop battles. And they lend themselves to multi-player. The good thing about not having fixed army compositions and the need to keep records is that we can vary the armies within the permitted parameters from battle to battle. From my perspective, the game is giving us a continued rationale for what we play on Tuesday evenings without being too onerous.
Sunday, 27 September 2009
I Legio Command Stand


 I tried something slightly different with one of these command figures. He came with a large aspis-type shield, which was just crying out for some kind of appropriate design. A few months ago, I saw some really nice 15mm Imperial Romans in a Field of Glory game. The guy who painted them had used the troopers' shield design transfers on command vexillia, so that the command flags had the same device as the shields. Some judicious slicing produced the same kind of effect here. I'll probably do the same for the cavalry when I eventually get round to those. It is quite difficult to do, since the LBMS transfers are shaped for specific shields, but I'm happy with how it looks.
1st Legio Triarii
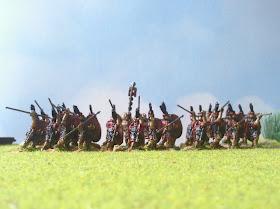


 I used Xyston 15mm lances again as spears for these guys. The dynamic poses made it difficult to fit them all onto the bases, especially with the spears as opposed to the pila of the hastati and principes. I'm glad I decided to go with deeper than normal bases (30mm as opposed to 20mm) for aesthetic reasons. In Tactica II legionaries can deploy in single ranks, and 20mm depth just doesn't look good.
Thursday, 24 September 2009
More action and unit shots from Callinicum at Claymore
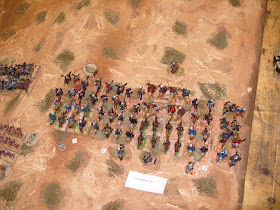
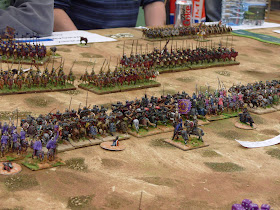

 The first shot above is a top-down view of the struggle between the Arab forces. I like this one because it shows the basing technique I'm using on all of my newer figures, as well as the ongoing revamp of my older stuff. The second photo shows the impending clash of cavalry in the centre, from behind the Sassanian lines. Number three is the Roman left wing moving forwards. The final photograph is part of the struggle in the centre, this time from behind the Roman army. Thanks again to Billy for the pictures.
Action and unit shots from Callinicum


 The top photo is a taken from the rear of the Roman infantry. The second shows them advancing against the Sassanian light horse. The third is the advance of some of the Sassanian heavies. Picture no.4 is an action shot of Sassanian heavies going into combat as their light horse retires past them. The final one is a frontal close-up of the Roman infantry. The labels scattered around the table gave command and unit details, but in practice they were hardly needed. Round markers are casualty bases that we sat on top of numerical casualty chits - aesthetically more pleasing.
Wednesday, 23 September 2009
Empire, Turn 1: 350-340 BCE
We have now played the entire first turn of the campaign from Philip Sabin's Empire game. A summary of the events:
1: Bactria slips from Persian control.
2: The Macedonians under Philip II attack Greece and are defeated in a close-fought battle. Prince Alexander is badly wounded leading the Companions.
3: The Persian Empire fails to add Aegyptus to its dominions.
4: A Carthaginian invasion fleet is scattered off Sicily by severe storms.
5: Rome just fails to bring central Italia under its domination when a consular army is defeated and the consul killed in battle.
Strangely enough, not one of the major powers has managed to add to its territory; indeed, the Persians lost a province. All of the battles have been incredibly close, two of them draws. Maybe we are just getting better at Tactica II.
Rome tries to expand
 This is the latest in our ongoing campaign. The Romans in red try to destroy Etruscan influence once and for all. A standard Camillan consular army deploys for the attack in an area of gently rolling hills. The Roman commander places his Italian allies to the left near the only steep hill, and all of his cavalry on his right. The opposition sets up with a central Etruscan phalanx. To its left is a unit of Italians, a unit of light infantry, and two large units of Etruscan horse. To the right of the phalanx are more Italians, plus light infantry and light horse; there are also some skirmishers out front. I produced both army lists as Tactica II variations, so I was content to fill in the numbers and play a minor role; I ended up as the commander of the right wing light troops against Rome. Gordon played the Etruscan centre, and Mark was the left wing. Facing him was Billy; William held the Roman centre; and Simon had their left against me.
The Romans advanced purposefully as is their wont. The Italians on their left held back a little, somewhat slowed by the steep hill. The Etruscan horse was stronger than the Romans facing them, so elements of the rightmost (socii) legion peeled off to stop their flank being turned. They needn't have worried, since the Etruscans drove the equites from the field and followed in hot pursuit, effectively taking themselves out of the game. However, this gave the Etruscan phalanx the edge against the Roman legions in the centre. The two Roman legions grudgingly gave way and then finally crumbled, just as the Etrsucans' Italian allies were destroyed. The Roman consul of the day went down fighting bravely with the Triarii, taking his opposite number with him. Both armies reached their breakpoint at the same time.
Doing a re-count afterwards, I realised that if the Romans had not committed their leader, they would in fact (just) have won, the loss of two legions plus all of the cavalry being outweighed by the survivial of the socii legions and Italian allies. The death of the general swang it to a draw, which in campaign terms means that the Romans retire to build up for their next attempt.
Saturday, 19 September 2009
Thursday, 17 September 2009
Deployment Plan for Zama
 This is (hopefully) the deployment plan we will use for Zama: Romans in red and Carthaginian army in dark blue. The legionaries are in spaced columns with velites out front to take care of the elephants. The Roman left is a load of mediocre cavalry; the right is covered by Numidian light horse with skirmishers in support. The Carthaginians have elephants, followed by three lines of foot: Ligurians and Spanish with Numidian and Balearic skirmishers; Carthaginian levy; and at the very rear, the veterans from Hannibal's campaigns in Italy. Their right flank is comprised of a smaller number of cavalry than the Romans, albeit of better quality; and their left is a smaller number of Numidians, again of better quality than those facing them on the Roman side. The main reason for making the Carthaginian cavalry better is to give it as good a chance of lasting as long as we can - we don't want the cavalry melee to be over too quickly. Also, cavalry of lesser quality is more likely to go chasing off after routed units under Tactica II, which seems to be what happened on the Roman left. Once we kick around scenario-specific rules a bit more, I'll post those as well.
Sunday, 13 September 2009
Saturday, 12 September 2009
Thessalians


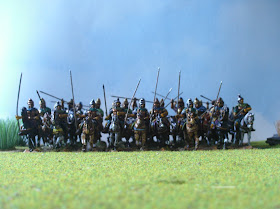 In between batches of Romans for Zama, I'm trying to keep some sanity by completing various renovation jobs on my other classical period figures. Some are painted better than others, so need less updating; some are entirely unpainted. The guys above are a mix of Old Glory in the front rank, and Essex behind them. Even the Xyston lances are getting a bit bendy, but some freshening up and re-basing has extended their gaming life very nicely.
Friday, 11 September 2009
Wednesday, 9 September 2009
Persians invade Aegyptus
 Yesterday's game was the invasion of Egypt (Simon) by the Persians (Gordon and Mark). Since I didn't supply any of the figures, I don't know the army compositions in detail; suffice it to say that both sides had a load of mediocrity with a few good units in the mix. Simon allocated me the left wing of the Egyptian army, which is what is represented above. Our centre was lots of infantry, half with bows and half with spears, and our right was loads of light infantry. The Persian army was light on infantry, with many cavalry and skirmishers right across the board (I haven't shown these). Above is the deployment situation on my flank - I have no idea what was going on elsewhere (Egyptians in blue, Persians in red), apart from the sands running red. I had one unit of 12 Horse Archers (HA); one unit of 12 Medium Cavalry (MC); three units of heavy chariots, deployed in units of 3, then 2, then 3 models; and immediately to my right was a large unit of 18 Light Infantry in column, which was part of Billy's central command. Facing me, Gordon had two units of 8 Skythian Horse Archers (S1 and S2); behind them 12 Guard Heavy Cavalry (G) and a larger unit of 16 Persian Heavy cavalry (HC1); three large columns of Colonists (C1: 18 figures; C2: 18 figures; C3: 24 figures); and 36 mercenary Greek Hoplites in 3 ranks. The game was a draw overall, as both armies reached breakpoint in the same turn, which translates into a forced strategic withdrawal by the Persian invaders. The reason we "won", funnily enough, was because of developments in my sector as it linked with Billy to my right. Gordon came forward with his mighty host, albeit with the Hoplites lagging behind a bit. This meant contact right across our front before the Hoplites could get in on the act. Billy gave me more time by throwing in his Light Infantry, who died to a man. But it worked: I broke the big column of Colonist Cavalry (C3), and the Hoplites wavered; my chariots (C3) ploughed into them and drove them from the field. Admittedly, when the dust cleared, all I had left was that unit of chariots and a reserve of Light Cavalry with javelins (I haven't shown these - they did nothing all night). But we saved Egypt. Or at least, the Light Infantry did... At the same time as this was happening in Egypt, a large Carthaginian naval force was badly mauled by storms and so was unable to land and attack Sicily. Next week, a minor town no one has ever heard of called "Roma" (or something like that) will attempt to unify central Italia under its control.
Monday, 7 September 2009
Sunday, 6 September 2009
Wednesday, 2 September 2009
Macedonians attack Greece
 Above is the plan of our first battle using Phil Sabin's Society of Ancients game, Empire: The Macedonian and Punic Wars. This is a highly abstracted mechanism for playing an ancients campaign, and we have set it up for use with Tactica II. So far, Bactria has rebelled from Persian control, which we are rationalising as a Saka incursion, and Philip II of Macedon has attacked Greece, which is the battle we played yesterday evening. I brought in the Greeks (in dark blue above), and Simon the Macedonians (red). Our setup was Gordon on the left wing, commanding two units of 12 Peltasts in two ranks (P1 and P2), two units of 12 Militia Grade Medium Cavalry in two ranks (MC1 and MC2), and a unit of 10 Skirmish Archers (C). David commanded the heavy infantry centre, which was composed of four units of 36 Hoplites in three ranks (H1-4) and two units of 40 lesser armoured Athenian Hoplites in five ranks (H5 and H6), one at either end of the infantry line. I had the sixteen figures of the Theban Sacred Band (SB), two more units of 12 Peltasts (P3 and P4), and 8 Psiloi Javelinmen (PS) on the right. The Macedonian right was Stuart, with a unit of 12 Prodromoi in two ranks (Pr1), two units of 18 Light Infantry in three ranks (LI1 and 2), and the Companions led by Alexander (20 figures in a four-deep column). Their centre (Mark) was a unit of 32 Foot Companions (FC) and five 32-figure Phalanxes (S1-5), all deployed in four ranks, with some skirmishers in front. On their left, Simon had 12 Thessalian Heavy Cavalry in two ranks (T1); 12 Thessalian Light Cavalry in two ranks (T2); and the other two units of 18 Light Infantry in three ranks (LI3 and 4). The Greeks won by destroying all of the non-pike units apart from the Thessalian heavies, who fell back in front of one of the Athenian blocks. The crisis came when the Greek centre started to crumble, but one of the Pike blocks (S1) routed, and Alexander was badly wounded when the Companions were destroyed. This happened because Gordon was able to use his skirmish archers to damage the Prodromoi very badly before contact. A cascade of unfortunate events then befell the Macedonians on this flank as Gordon's Peltasts destroyed the Prodromoi and the two Light Infantry blocks one after another. In the meantime, his two cavalry units managed to swarm the Companions, one of them hitting it in a "wing" attack because the light troops were unable to protect the deep sides of the Companions in column. Eventually three Companions and Alexander made their way through, only to fall to shooting from the Peltasts and the Archers. If this and the destruction of the pike unit had not happened, the Greeks would have lost. As it is, the Macedonians have retired to lick their wounds. Next week's game in the campaign is a Persian assault on Egypt.
Tuesday, 1 September 2009
On the painting tray for September
In August, I managed to paint 15 Garrison Hoplite Greeks and complete 24 Hastati and 24 Principes, including basing for the Romans. That's 63 figures in 25mm. In order to be able to put on Zama, I need to paint 50 infantry per month; it does look as though I'm on target, so far at least. For September, I have on the tray another 24 Principes; 24 Triarii; a Legionary command stand of 4 figures; and 12 Slingers to update that I bought with a basic paint job already on them. If I manage this lot, I'll have the whole of the first legion for Zama and some of the slingers for the Carthaginians, if needed.


