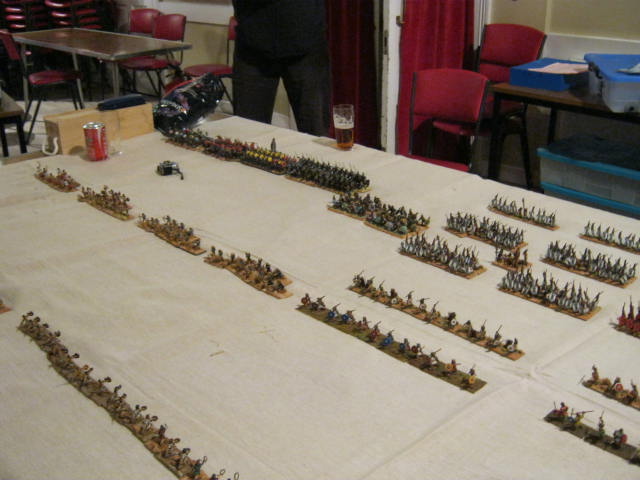
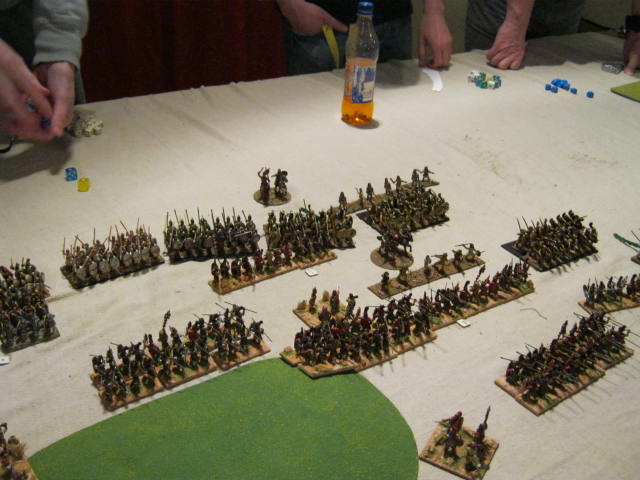
I should have written this up over a week ago, but this time of the year can become rather busy. Anyway, we played out a Roman attack on Carthaginian-held Sicily. The Romans were about to win, but we ran out of time. The reason is that it took us an extra 45 minutes to get to the club in the first place, because all traffic in and around Glasgow city centre was at a virtual standstill due to the weather. Here's the deployment map. Carthage in blue at the top of the map, Romans in red:

Terrain is minimal - a low hill at the front left edge of the Roman infantry deployment zone and a large piece of rough on the Carthaginian left flank. William constructs and deploys the Carthaginians and I do the same for Rome. The Carthaginian right flank has a lot of cavalry with some elephants. Their centre is composed of Italians and Hoplites, and is mostly held back. Their left is a less powerful but more manoeuvreable mixture of cavalry and elephants, with some more Italian foot to help out. William guesses my deployment almost exactly right: all the cavalry on the open left, then a couple of small units of Italians, then the legions and, held back as far as possible, more Italians. Both armies have the usual mix of skirmishers out front.
William's guess doesn't quite account for two things. First, the two units of Italian foot to our left will come in handy for us. More importantly, he wants to run the Carthaginian right wing cavalry himself, which means he is having to rely on others (Simon and Marco) to lead the left flank attack. Billy runs their infantry centre. I take the Roman left and left centre, and Gordon takes the rest of the Romans. Photographs are mostly taken from the Roman left flank, because that's where I am.
 |
| A large gap between the central infantry lines. |
 |
The cavalry closes and the Italian infantry advances over the hill. |
 |
| A mass of horse thunders towards the open space on the Roman right; the Italian infantry angles to face them. |
 |
| On our left, the Italians keep going and the legions come up on their right in support. |
 |
| The same moment, into the centre. The Roman army is leading with its left while the Carthaginians are trying a double envelopment. |
 |
| The infantry starts to clash - in the meantime, the cavalry on the Roman left and Carthaginian right are busy hammering each other into oblivion. A cavalry stalemate is acceptable on this flank to both sides. |
 |
| The infantry centres get closer. |
 |
| On our extreme right, the Italian infantry marches forward to kill as many enemies as possible before meeting their own demise. Some Numidians make it behind the lines, only to be met by a hail of missile fire. The Carthaginian general looks over at this point from his desperate struggle against the Roman cavalry. Various helpful mutterings are heard from his aides about collecting nails for the sub-generals on their left. Losing Carthaginian generals were supposedly often crucified by their own people! |
 |
| The Romans start to grind the enemy centre with meticulous and merciless precision. The Carthaginians really need that flanking force to get a move on! |
 |
| More of the same. The Hastati are especially effective in this game. |
 |
| The far Carthaginian flankers are beginning to make a concerted appearance; note the gap behind the Italian infantry. They are very much on their own, but Gordon calculates (correctly) that it will still take the enemy a while to get into the centre. |
 |
| The Italians on our left destroy the elephant, which routs into the other Italians, disordering them. The Italians fighting for Carthage are also disordered on morale! All of the Carthaginian infantry are beginning to look rather ill by this point. |
 |
| The Principes line up for the coup de grace. |
 |
| Finally, the Carthaginian cavalry gets behind the Roman lines on our far right. Here they are about to charge the rightmost Latin legion. |
And then we run out of time. The Latin legion on the right is routed by the Carthaginian heavy cavalry ("About time too" says William), but they are too far away from anyone else to do any more damage. If we had another turn, the entire Carthaginian centre would have been wiped out to a man and the Romans would have won.
No campaign games for a while, but we are hoping to have a large multiplayer game of Magnesia. Assuming the weather doesn't get us again, that is.



.JPG)




.jpg)


.JPG)