Tuesday 27 March 2012

Welcome to Richard

...of BBtoyshobbies, which has a load of lovely 1/72 medieval Russian cavalry on show.  Do have a gander...

Saturday 24 March 2012

Armoured Immortals

By Foundry:
A shot from in front and above to show the basing style, which is pretty much my usual.
How they look from the front, where the Greeks are usually located...
Here they marching to the right...
...and to the left.  Very disciplined, they are, for barbarians, says he with an Attic sneer.
And here is a Persian commander's view, except for Mardonius, who gets killed in front of the unit.  Hope you likes' em!

Welcome to Felix Fox...

...whose blog is here with lots of lovely medievals.  Thanks for linking in!

Wednesday 21 March 2012

Empire Campaign: 230-220 BC

Events during this turn:
  • The Carthaginians conquer Southern Gallia
  • The Ptolemaic Egyptians continue their run of success by taking Armenia
  • The Bactrian Greek invasion of Mesopotamia is defeated
  • Rome conquers Cisalpine Gaul
  • The Indian invasion of Parthia is defeated by the Bactrian Greeks
  • The Macedonians reconquer the rebellious province of Pontus
This takes us to 220 BC.  First up, Bactria rebels from Indian control.  And Hannibal is unleashed on Rome: the 2nd Punic War begins.  However, I have heavy commitments for the next couple of months, so it looks as though we will be taking a break before we can play any more.  The strategic map now looks like this:

Sunday 18 March 2012

Immortals' unit command

These figures are from Foundry's pack of Persian foot command:
I'm putting the Immortals on deeper bases than their hoplite opponents, partly to show the difference in their formations, but mostly because I really enjoyed painting these as a change, and I want to show them off to best advantage.
How they look to a Greek.
A view from one side...
...and from the other.
Finally, how they look from behind.  As bright as possible!

Rebellion in Pontus collapses

A Macedonian field army strives to reconquer the rebellious region of Pontus in the Empire campaign.
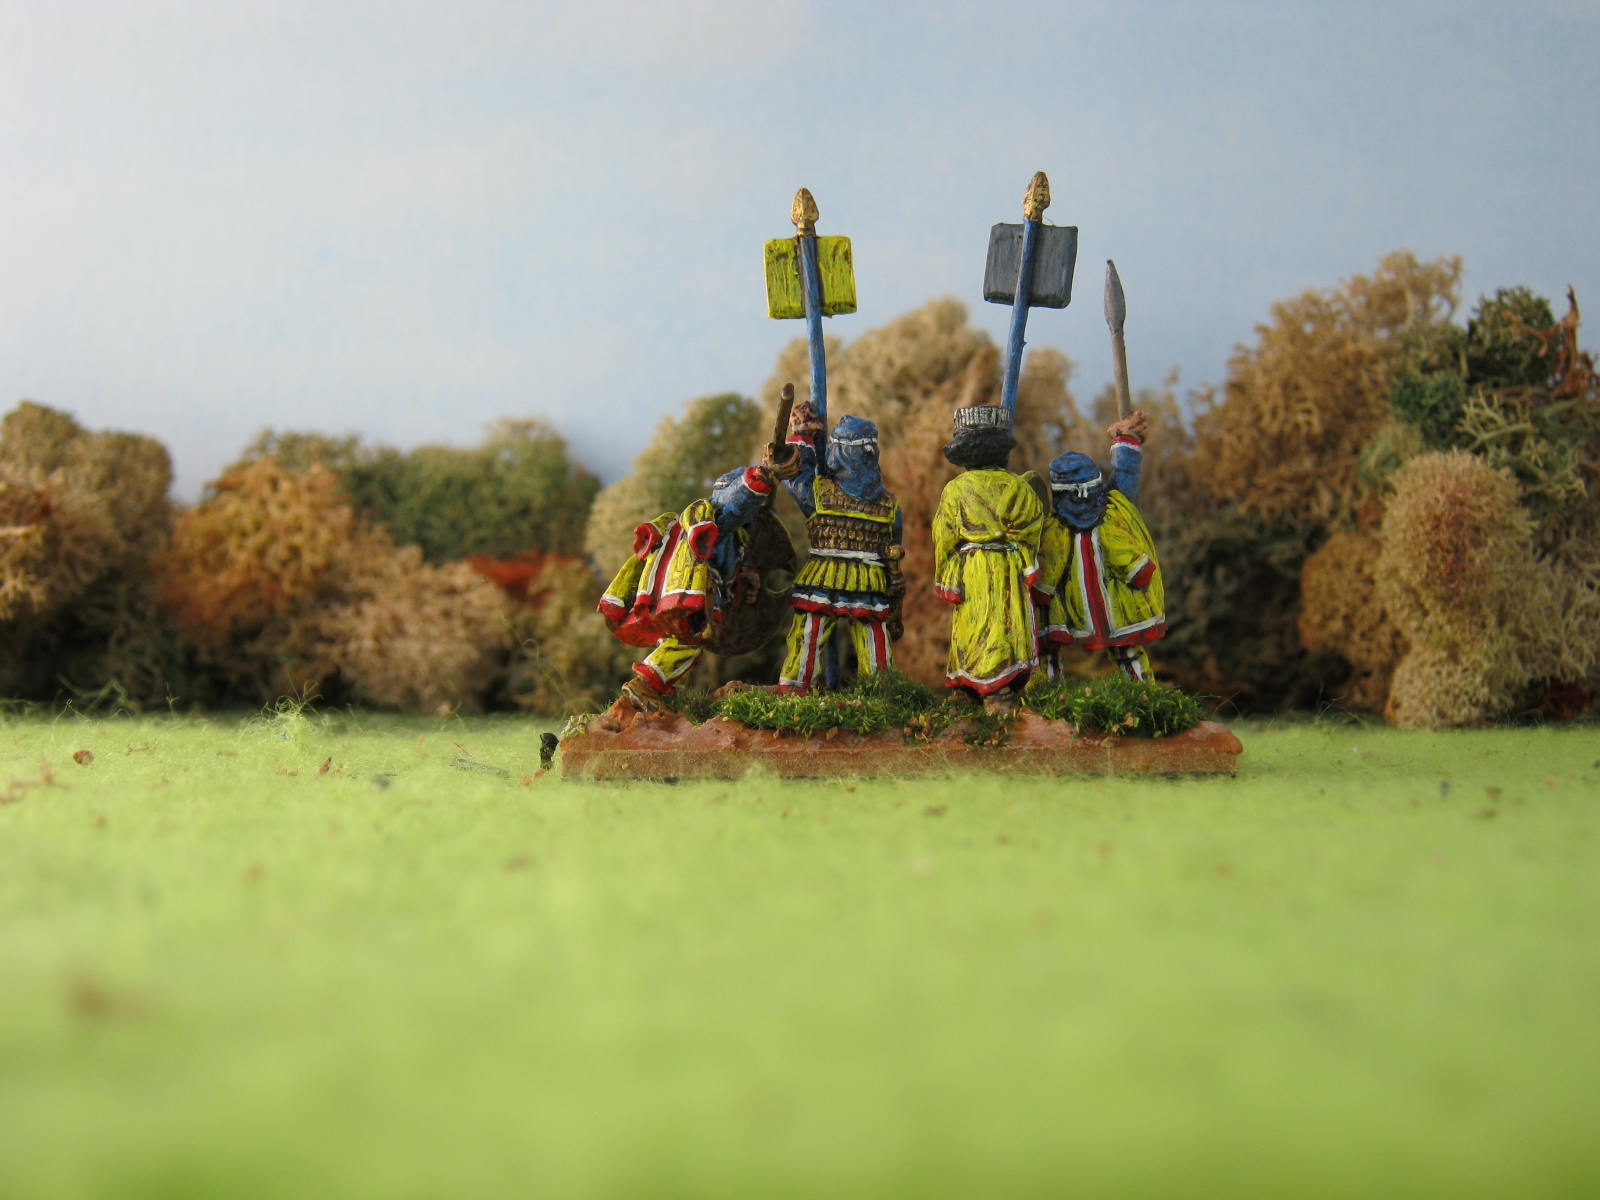
I constructed both army compositions, but had no preference which of the two to play.  In the event, Gordon set up the defenders while I deployed the Macedonians.  Photo number one shows the right wing of the defending Pontic army, which Gordon commanded in person.  The perspective is mine, from the left wing of the Macedonians.  A skirmish line precedes a unit of 12 Light Horse, 12 Heavy Cavalry, 36 Galatian infantry in three ranks, and a couple of scythed chariots.  The far Pontic left wing is a mirror image of this command.
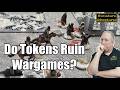
Above is my meagre command: some skirmishing slingers, three units of 12 peltasts and a unit of 36 Thureophoroi in three ranks.
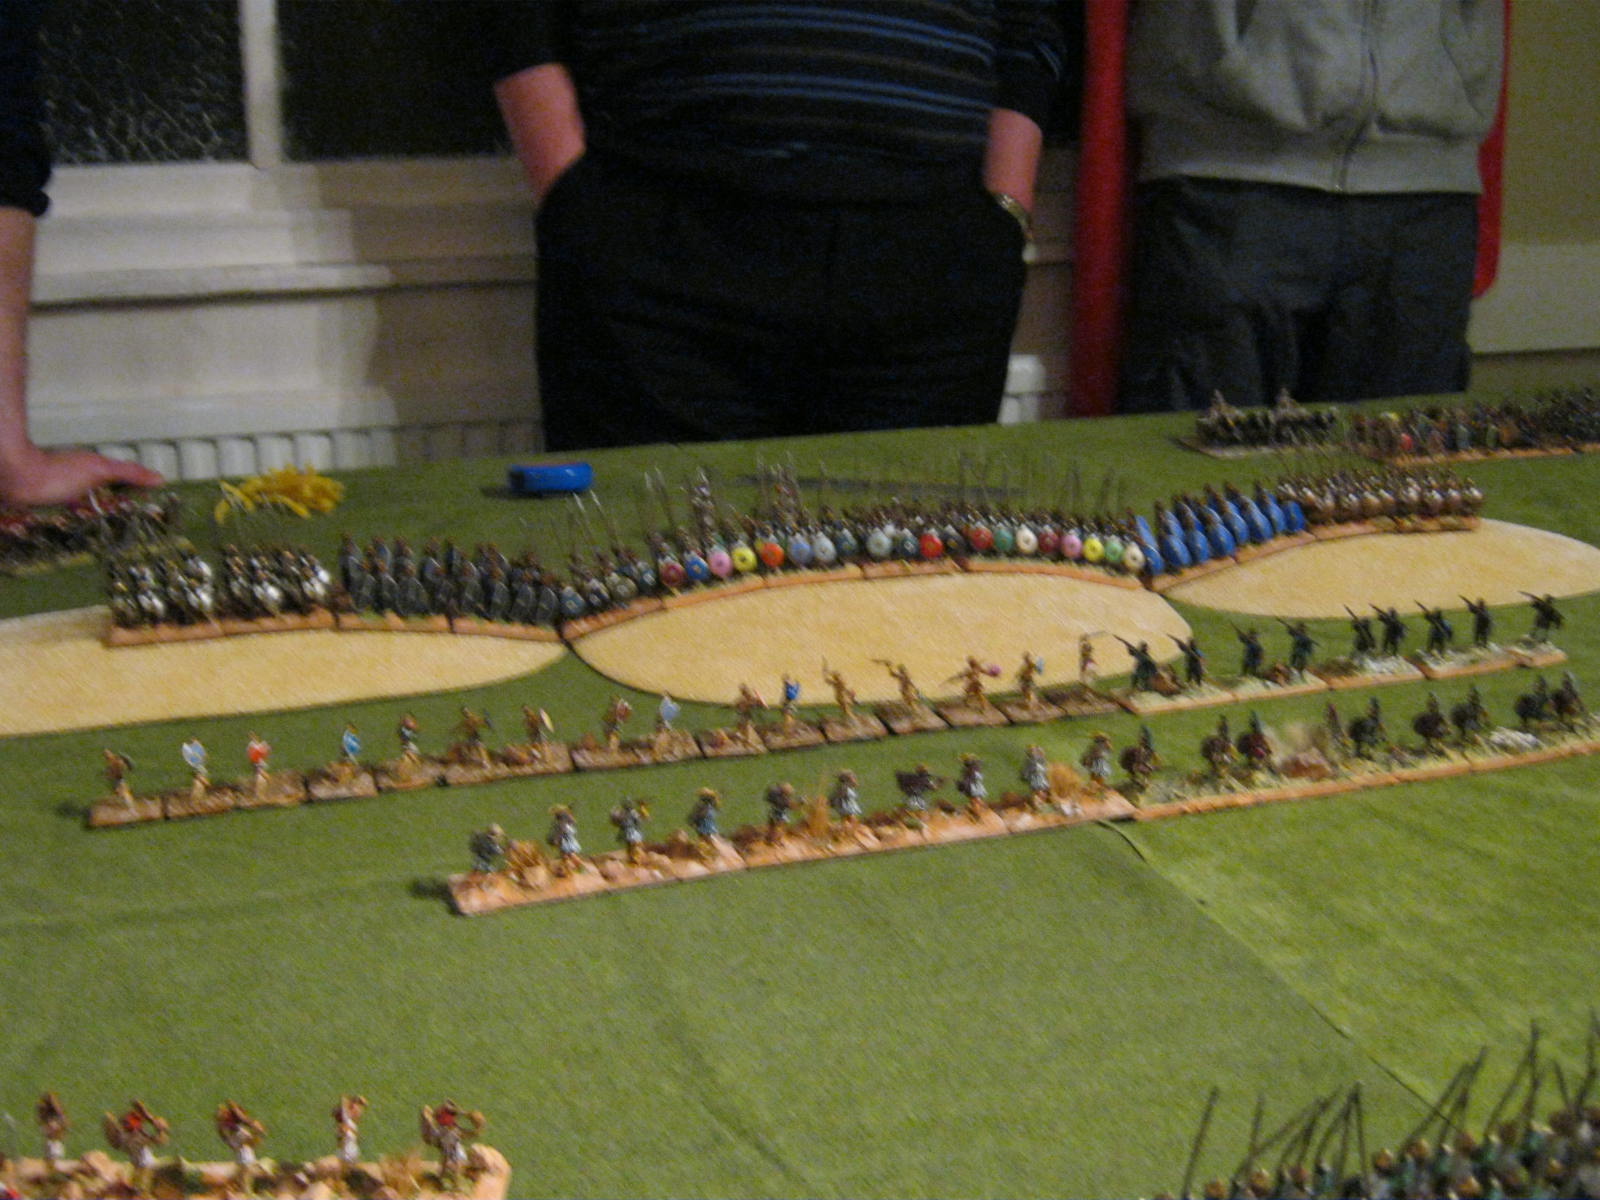
I don't have a decent photo of the central Pontic deployment, which comprised a symmetrical set up of medium phalanxes, Thureophoroi and a couple of small heavy phalanx units, the best troops in the defending army, arrayed just behind a long central ridge with plenty of skirmishers. The photo above shows the centre of the Macedonian army, five units of 36 heavy phalangites in three ranks, with javelin skirmishers out front. David runs this lot, against Willie as the central Pontic commander.
Above is a shot looking from the Macedonian centre towards their right.  This wing is composed of two units of 12 heavy cavalry (one of which is elite) and two units of 8 Light Horse, with the usual skirmishers out front.  Basically, I've gone for a main right punch, powerful central phalanx, and left wing flank guard, a classic Macedonian attack en echelon.  Billy will lead the assault, against Alan of Pontus.
My first action (above) is to pull back my peltasts.  I need to prolong the action here as long as I can to keep Gordon off the flank of the central phalanx.
In the centre, the Pontics move their large infantry centre onto the hills.  They are not as strong as the Macedonian phalanx, but the hill will help to compensate.
Just above, you can see the start of the Macedonian advance, with the cavalry leading from our right.
Back on my flank, Gordon advances as quickly as he can.  My peltasts are now facing the right way.  I don't have much of a plan; basically, I'll just wait for any opportunity for javelins and/or melee to present themselves to cause Gordon as much pain as possible before I'm wiped out.  Nothing personal...
I angle all of my troops towards my left as the phalanx advances in the centre.  Willie commits a small unit of heavy pikemen and some Thureophoroi to help speed my demise while the rest of the Pontics await developments on their nice safe hill.  My slingers are doing well, and the skirmish fight here is going in my favour.  Now if I can just get rid of the last of the enemy javelinmen I'll be able to shoot at some of Gordon's cavalry...
Gordon's light cavalry charges into my endmost peltast unit, so I take a calculated risk and advance the other two into javelin range of his heavy cavalry and Galatians.  Might as well make them angry.  At the same time, I retire my slingers behind the lines.  I fully expect to lose horribly, but if I can do enough damage, the slingers might get lucky and finish a damaged unit.
With the majority of Gordon's troops drawn off against my pelatsts, my Thureophoroi await the inevitable.  At the top right of the photo above you can see our phalanx attacking as the Pontic centre comes off the hills.  Gordon is worried that his right wing attack will be too far out of touch to swing into the middle of the field.
A furious infantry combat develops.  At the top of the photo above, you can see that Gordon has swung his chariots into the centre to try to plug any gaps.
I start to lose, as expected.  Unfortunately for us, so does the leftmost unit of David's phalanx...
My peltasts have been swept away, but the Pontic heavy cavalry have taken a great deal of damage.  I'm hoping that even if they do swing into the centre, they will be too weak to exploit properly.
David's leftmost phalanx collapses ignominiously, but the rest of the pikes make large holes in the centre of the field.
And on our right, Billy's cavalry charges in with great gusto.

In the event, it was quite a comfortable victory for Macedon.  The enemy centre was annihilated and Billy's cavalry swept their opponents from the field, more than making up for loss of my command and 20% of the phalanx.  This takes the current campaign turn to its conclusion.

Tuesday 13 March 2012

The Persians hang on

...against the Indians.  This is just a short text report of a battle we played between Simon's Indians and the Bactrian Greeks who now rule the remnants of the Persian Empire in the campaign.  It was a real line 'em up and have a go type of fight, which the defending Bactrians just edged and no more.  The high points for me as the Indian commander were the effectiveness of our archery, which destroyed the Companions, and the better than usual performance of our cavalry.  But these weren't quite enough against the phalanx.  However, if we do play this one again I think I know how I will compose and deploy the army...

Saturday 10 March 2012

Persian Command

These are my test figures for the colour scheme I want to use for my unit of Immortals for Plataea:

I've gone for really bold colours to make them stand out.  I usually avoid yellows and blues because they were relatively expensive and, thus, rare.  Which is exactly why I chose them for the Persians - the more opulent, the better.
I did consider doing some really intricate designs on the clothing, but settled for the bright and bold look.
  I wanted a sort of compromise between full court dress and a campaign look, especially for the unit to follow.
These are the first Achaemenids I've ever painted.  I must say that I am really enjoying them; they make a nice change from regimented Romans or bronzed Greeks.  Figures are by Foundry; the transfer I used for the standard is by LBMS.  It's a 15mm Kardakes shield design, which fits nicely onto the small square standard.

Immortal Miniatures Hoplites

Just finished basing this lot for Willie:
They are quite difficult to rank up properly on WRG standard bases, but I'm hoping that they look like a formidable shield-line.  I used a variety of transfers.
I also tried to vary the look of the body armour to make them seem as individual as possible.
I gave the officer types round shields with arms that I had left over from a load of Old Glory figures; one of them is third from the right in the photo above.
And here's how they look from behind.  I put all of the unarmoured guys in the rear rank.

Thursday 8 March 2012

Finished Anne Boleyn


I'm quite pleased with the finished product.  The gold on her gown was very time consuming.  I also decided to spend some extra time on the pedestal and some of the other details, such as the rose and the handkerchief, just to make it them less plain.  The next thing I'll need is a dome display case because she is going to the US - I want her to arrive intact!

The Romans finally take Cisalpine Gaul

But not without a fight!

Work has been even busier than usual, so I haven't had the time recently to catch up on our campaign events.  I'm now about to make up for that:
Photo 1 above is a shot of the relative deployments.  A Roman consular army (on the right of the photo) has invaded the Po Valley region and found the locals in eager mood in a rolling valley area between two steep hills.  The Roman set-up is pretty much standard.  Gordon presented with a relatively weak centre and right, with deep columns of foot on the left, which can just about make out at the top left of the photo.  His idea was to hold the legions as long as possible in the centre and right while attacking en masse with the columns.
The second photo shows the Roman advancing where the tribesmen were weakest.  Alan ran this half of the Roman army, while I ran the two legions and horse on the right.  As he advanced, I stayed still.
The reason for my caution can be seen above.
And there were even more of them to my front right!
I tried to retire the troops at my extreme right to force the opposition to take as long as possible to get to me.  The Italian allied foot (blue shields) have obeyed orders, but the stubborn Roman Equites stayed put.
  Alan's advance continued.  Above you can see the situation on his left flank with the cavalry of both sides facing off and Italian foot ready to attack uphill with legionary help.
Alan continued to press forward where he had central superiority as well.
And on they came at my right...

Stand-off at our far left, although Roman shooting was beginning to damage the opposition, especially their unit of heavy cavalry on the lower of the two hills.
Mixed fortunes above...
...as my lot continued to hang back as far as possible.  Those Equites still refused to retire.
Rather than be shot to bits, the locals charged off their hills into the waiting arms of Alan's cavalry.
And the columns crashed into my Hastati.  I staggered my defence, so that the rightmost legion hung back furthest of all.
I needed Alan to win in the centre while I held out as long as possible on the right against superior numbers.
And still my Equites failed to obey orders!
Alan's cavalry was successful, and his infantry assault began to push the enemy off their hill.
And his legions cleared the centre.

That's all I had time to take because once the columns went in I was right up against it.  My entire half of the army crumpled.  The Italian foot, the bothersome Equites and one Legion were all wiped out.  My other legion was down to its Triarii before Alan managed to get some of his troops into one of the columns to save the situation.  We were further helped by the death of the enemy general who, after crushing my legionaries, was in turn destroyed by Alan's reinforcing troops.

To be honest, I deserved to lose, but Alan's men saved the day.