Wednesday 23 March 2011

Carthage takes Magna Graecia (again)

Last night saw the return of Carthage to Magna Graecia.  The photos aren't any good, so I won't use them.  Suffice it to say that the mercenary Sicilian foot simply carved their way right through the centre of the Italian infantry - game over, and very quickly too.  The Carthaginians managed with contemptuous ease a feat that Pyrrhus' famous phalanx signally failed to do last week.

Magna Graecia has become a real battlefield in our Empire campaign, fought over by Romans, Carthaginians and Macedonians alike.  Next up will be the Persians trying to grab crucial Victory Points by attacking India.  Since this is now the era of the Successor States, we'll use Graeco-Bactrians for the attacking force.  Should be a good battle, but I won't be able to make it next week.  I'll supply the attackers, though.

Welcome to Hendrid!

A hearty hello to Hendrid, whose webpage is here and blog here.  Lots of terrain ideas, solo play tips and general goodness - go have a look.  It might take you some time...

Tuesday 22 March 2011

Welcome to Biff Tanner

Hi Biff, thanks for joining.  Biff's blog is here.  There's a whole lot of tech stuff - the water-powered jet pack is amazing.  This means that we now have more than fifty followers, and over 20,000 hits.  Makes it all seem worthwhile, so thanks everyone for the support!

Monday 21 March 2011

Pyrrhus in Italy

Rather belatedly, Pyrrhus lands in Italy as part of our Empire campaign, taking advantage of the temporary ousting of Rome by the local Greek city-states.  He immediately heads for the Italians in the hills after gathering some reinforcements from said Greeks:
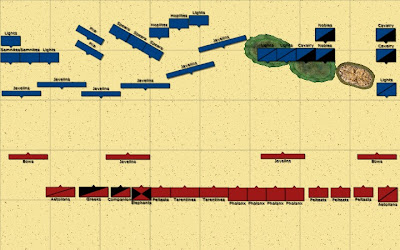
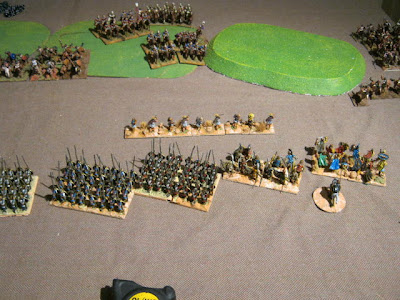
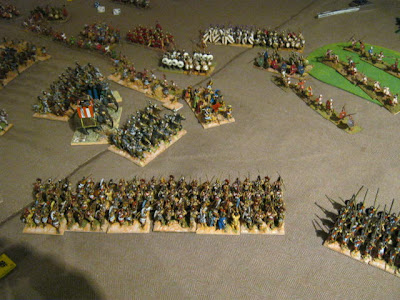
Simon and William construct and deploy the Italians, who are in blue at the top of the map.  Here's a description from their right to left, ie starting at the top left of the map as you look at it.  Their right wing (Marco commanding) is composed of two units of 12 Samnite armoured light infantry with pila, supported by two units of 12 light infantry with javelins.  Just to their left are two units of 24 Italian medium infantry with pila, deployed wide.  Their centre right (Simon) has three units of 24 Italian medium spearmen in three ranks and two units of 24 armoured hoplites in three ranks, with an extra unit of 12 light infantry to their left.  The infantry commands are screened by many javelinmen. William commands the left wing cavalry force, which has two units of 12 medium horse in column screened by 8 skirmishing javelin light cavalry ready to come round the far end of the hills.  More into the centre are two units of 12 noble heavy cavalry and two more 8-figure units of light horse .

I make up and deploy the invaders.  The set-up is relatively conventional.  Gordon commands our left, which is where the majority of the mounted troops are located: a large unit of 12 Aetolian light horse with javelins; 18 Greek medium cavalry; 12 elite heavy cavalry; two elephants; and 12 peltasts.  He also commands the two units of Tarentine medium spearmen in our centre.  I comand the right: four units of 32 heavy phalangites in four ranks; three units of 12 peltasts; and another unit of 12 Aetolian light horse, this time in column.  We also have skirmishers out front, although not so many as the opposition.

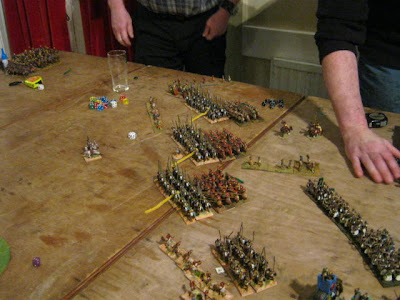
Terrain is a large area of high ground in front of the enemy left, rising to a steep prominence at their leftmost wing area.  Our set-up is reasonably straightforward: line up to hit the Italian infantry on the hills.  Screen the phalanx to its right with lots of light troops.  And mass the rest of the army on our open left.  The only problem is that the Italians don't play ball, instead massing all of their infantry at an angle to our extreme left and placing all of their cavalry in and around the hills.  There's a bit of a gap in their centre.  All of the following photos are taken from behind our army:
In the photo above you can see the mass of Italian infantry off to our left.
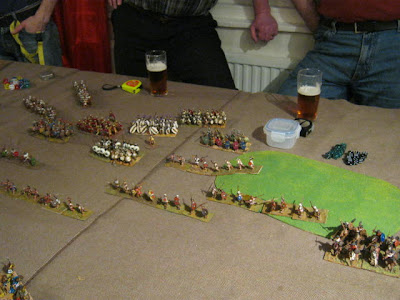
Gordon decides that he can't afford to attack the infantry to his front head on, so he swings his forces across the centre front of our infantry line.  He doesn't think many of them will make it, but he hopes to slow down the opposition long enough for my phalanx to get into action.
I angle some of the phalanx towards the hills, hoping to head off his cavalry before they get behind my right flank.
I also move my light troops so as to meet his cavalry force that's threatening to come around the extreme edge of the ridge line.
Gordon's troops do their best in the traffic jam while my Tarentines angle inwards a bit.  A gap is beginning to appear between them and the phalanx.
The enemy cavalry advances towards my waiting light forces on our extreme right.  You can just see the phalanx to the left squeezing the enemy cavalry  - the steep hill at the extremity is cramping their style.  By being aggressive with the phalanx, I might just pull this off.
The centre continues to look a right mess.  This is one confused and confusing battle.
I have managed to force the enemy horse to retire behind the ridge.  Now I have to reorganise the phalanx and hit the enemy infantry closest to me before they finish off Gordon's troops and flank the left of our infantry line.  This is going to be close.
Desperate fighting as my light horse and peltasts try to stop the enemy cavalry on the right.
In the left foreground of the shot above you can see my phalanxes moving back into the centre.  And at the same time another wave of enemy cavalry starts to come around the hills.
The remains of the peltasts move into position to stop the latest development on the right, as enemy light horse pelt them with javelins.
More of the same.  Basically, we cancel each other's momentum here.  Which at least means the right rear of the phalanx is safe.
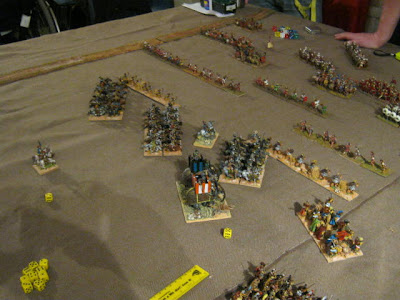
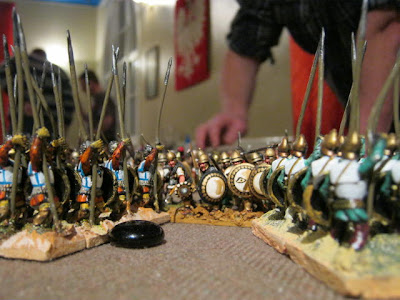
The moment of truth arrives - I thought a suitably dramatic close-up would be good for the final photo.  As the enemy infantry starts to roll up our Tarentines, the phalanx finally goes in.  Note the Carthaginian spearmen standing in for Italian hoplites - could it be captured armour?  In any event, it is all to no avail for us.  Pyrrhus personally joins the left of the two phalanxes you can see from behind here to try to shore up their morale.  It fails, and he and his phalanx are disordered by our routing elephant unit.  I throw in the next unit along and roll no hits from 32 dice (I should have got 10 on average!).
And that was it, game over for Pyrrhus.  His much vaunted phalanx was obviously still seasick or something.  We actually won the race, getting the phalanx to the right point in the line just in time before our left crumbled, but I couldn't hit a thing.  And just as the local Italians celebrate their victory, news comes that the Carthaginians have stabbed them in the back by assaulting from Sicily!  That's the next game, hopefully tomorrow.

Saturday 12 March 2011

MiniMike

A hearty hello to MiniMike: blog here.  Go and have a look for some really lovely 28mm Spanish Napoleonics, among others. The tails on the backs of the Grenadiers' hats have to be seen to be believed!

Friday 11 March 2011

Empire Campaign Turn 9: 270-260 BC

Things in the campaign have been at a relative standstill for a while due to the burgeoning social lives of my kids: birthday parties, clubs and so on all seem to be pretty heavy at this time of year.  Anyway, we have now completed Turn 9 and are about to move on to Turn 10, the midpoint Victory Points turn. Events in Turn 9 were:
  • Carthage fails in Iberia
  • Rome runs out of time in Sicily
  • Macedon fails in Syria
  • Persia fails to reconquer Persia
So all of the major powers are back to what they do best: losing! Marco had the honour of rolling for the initial events in Turn 10, with the result that Magna Graecia has rebelled from Roman control and the Macedonians have attacked across the sea into the same region.  Our rationale is that the Greek city of Tarentum has instigated the revolt, but the Italian hill tribes remain loyal to Rome. All of which means that next week's battle will be Pyrrhus and the Tarentines against the Italians. A bit later than he turned up historically, but it will be interesting to see if this leads to a Pyrrhic confrontation with the Romans.

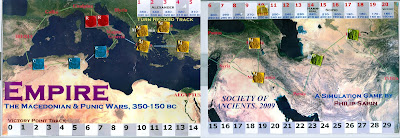
The current strategy map:
The Carthaginians control Carthage, Numidia and Sicily. Rome holds Central Italy.  The rather large but disjointed Macedonian Empire comprises Macedon, Greece, Thrace, Asia, Armenia and Mesopotamia.  And the Persians are still grimly holding on to Parthia and Bactria.

The Succession Wars begin in earnest

On Tuesday we played the final game in Turn 9 of our Empire campaign. Although in our alternative universe the Persian Empire was not entirely conquered by the Macedonians, it has been reduced to a shadow of its former self. This is in part due to the Macedonian onslaught, but multiple rebellions have played a part too. The rump Persian state now controls only Parthia and Bactria. On Tuesday it tried to take Persia back from the current rebellion. We ruled that even though Alexander the Greatly Mediocre failed, the relative superiority of the phalanx system has been adopted by the various powers. This is a blatant fudge, for which we do not apologise. The reason for doing so is that we were getting a bit bored with the same forces of Achaemenid Persia fighting the Macedonians, so we have decided to use Successor armies from now on. The invading "Persians" used a Graeco-Bactrian army, and the defenders were Early Seleucid:
William chose the attacking Graeco-Bactrians, in blue at the top of the map. He and Simon set them up. Simon ran the right wing, which consisted of a unit of 12 Companions and two units of 12 Bactrian Heavy Cavalry as the main contingent. Inside those towards the centre were four units of 8 Light Cavalry. Two were Persians with javelins and the others were Skythian horse archers. There was a large unit of 18 Indian militia grade medium horse in reserve. William ran the rest of the army. The centre was comprised of three Phalanx units, each of 32 figures in four ranks, staggered en echelon. A lone unit of 12 Peltasts was positioned to their inside flank, and three units of 8 skirmish archers screened the front of the phalanx. The left flank of the phalanx was protected by two units of 24 Indian massed foot archers, one of which was deployed in two ranks, and the other in three. The left wing of the army had an advance guard of light cavalry: two units of 8 Persians and a unit of 12 Skythians. Behind them was a unit of 12 Bactrian heavy cavalry and 18 Indian militia horse. In reserve on this wing was a unit of 12 Peltasts.

I chose and deployed the Seleucids. Since the terrain was mostly flat, with only one low rise in our centre, I went for a symmetrical deployment. Gus and Euan ran the left wing, which had 12 Skythians in three ranks and a unit of 8 local light horse with javelins. Behind those came a unit of 12 Companions, and to their inside was a unit of 12 Peltasts, a couple of elephants, another unit of 12 Peltasts, and a unit of 24 Argyraspides in three ranks. The right wing, which I controlled, was a mirror image. Gordon ran the central three phalanxes, each of which was 36 figures strong, deployed in three ranks. There were various skirmishers out front.

Since we were the defenders, all we had to do was hold for a draw, which is why I went for this deployment. I deliberately set up as far back as possible, hoping to do as much missile damage to the attacking loyalists as possible before contact. I was expecting the enemy to have quite a few elephants, and it was something of a surprise to see that they hadn't brought any with them at all.  William had gone for a variation of the attack en echelon, leading with the left.  Here the Indian infantry were positioned so as to move out and extend the infantry line while the cavalry charged home.  Simon's wing had most of the powerful cavalry units, tailing off with skirmish-capable lights to take advantage of any gaps that might present themselves in the centre.
Massed enemy cavalry advances on our left

The enemy advances on my wing. Note the Indian infantry moving wide.
My response is pretty much to hold my cavalry while shifting the elephants and Peltasts more to my right, followed by the unit of Argyraspides at this end of the central phalanx. The idea is to try to counter the enemy weight that is coming towards me.
Move and countermove continue on my wing
Above you can see developments in our centre and towards our left. A large melee has developed on our extreme left wing. Our phalanx angles in towards the enemy phalanx units, which have so far stayed put. In effect, the invaders are trying a double envelopment with their powerful wing forces while holding back in the centre as much as possible.
The fortunes of war are even on our far left wing. Our elephants have broken through, but have no one else to their front. Our cavalry are being roughly handled, though, so the far left unit of Argyraspides moves wide to protect the left flank of the phalanxes.
Our phalanxes continue to advance on the enemy. We have more weight, but they have firepower plus Peltasts on overlap to our left.  This is going to be close.
Back to my wing in the photo above. I have superior weight here now, but I can't unleash it until I clear the enemy cavalry.  With one eye on the fierce fighting between the phalanxes, I decide that I need to choose my moment before I can hit the Indian infantry effectively.
The fighting on our far left has effectively neutralised both armies' troops there. Well done to Euan and Gus for defusing the powerful enemy cavalry attack. The photo above shows the heavy infantry fight in what is now the centre , with my elephants poised to go into the Indians. The enemy cavalry on my wing has now been almost entirely destroyed.
A final shot of our right at the point of attack
As the phalanxes of both sides grind one another into the dust, my elephants charge into the Indians with great abandon, causing huge amounts of grief. I commit the Argyraspides as well, but the Indians just hold out and no more. Then the phalanxes of both armies start to disintegrate, and it's game over - a very honourable and bloody draw. Which means that, in campaign terms, the Persian loyalists fail to retake Persia proper.  The club was the busiest I have ever seen it, so we had to make do with a smaller tabtelop than we should have had, and no mat.  It was still a good game, though.

Monday 7 March 2011

Welcome to Tartar Sauce

A warm welcome to you. Apologies if you have a blog yourself. I'd like to link in to repay the favour, but for some reason Blogger doesn't always show a person's blogs when I click on the profile. It will bring up a list of those the person has joined, but not their own!

Sunday 6 March 2011

Welcome to Peter

Welcome to Peter. He has some lovely pictures of Teutonic knights, with great flags on his blog here. He says the figures are by Italeri, so presumably they are 1/72nd. I must admit that I'm always amazed when I see work like this in that scale - I think I'll stick to 25/28mm for ancients and medievals, myself. I know my limitations!

Welcome to Scullmeister

Scullmeister has just joined - thanks for looking! You've probably noticed that it's mostly 25mm Romans here at the moment. That was unintentional - I started doing the blog thing when one of our club members said it was effectively a way to get a free webiste. It has more or less taken shape depending on my current main interests, and just now that means Republican Romans. I blame the Society of Ancients for making last year's big game Zama. I am hoping to complete the army by the summer, which will give me pretty much anything I need for a consular army for the Punic Wars period. Well, the Romans and Latins anyway...

Cheers!
Paul

Tuesday 1 March 2011

On the Painting Tray: March 2011

In February I finished the Latin cavalry for my 25mm Republican Roman army. This month, the plan is to add to the Velites. I want to have enough figures to run large scale games based on a full consular army. If I can produce 24 Velites this month and the same again in April, I'll be happy. I want to have 144 figures per legion, plus the command figures and the 48 cavalry. I also have a hankering to paint some lighter horse as scouts. Crusader make some nice unarmoured Roman cavalry that should do the trick, but that's for the medium term.