Saturday 29 December 2012

Richard's Blog

During a conversation about the Hastings scenario on The Miniatures Page, Richard posted a link to his blog, which you can find here.  He is building up a load of info on wargaming medieval England; his command bases are lovely, so go and have a look!

Wednesday 26 December 2012

Successors for Willie

The last figures I'll finish this year, I think:
These are 1st Corps Agema.  They are lovely figures, and take a lot of work to paint as elite types.
I used the same colour scheme, especially on the cloaks, as for the foot companions I painted earlier this year.
Here they are, thundering across the plain...
...and here they are, on their way back again.
And a general to go with them.  "Oi!  You over there - carve my likeness so that it can be distributed on coins to the masses back home.  No, not from the front, my nose looks too big like this!"
"That's better, a nice aristocratic profile."
"Not the horse's arse!"
"Now the grass is in the way.  That's it! Off to the Roman Front with you!"

Just can't get the help nowadays.  Anyway, it remains to be seen how they perform in combat.  These will be the last painted figures I manage in 2012, taking my grand total for the year to 487.  It's slightly fewer than I was hoping, but then I also painted a couple of large figs, rebased all of my 15mm Russian Napoleonics and constructed the battlefield for Plataea.  So I'm not disappointed...

Saturday 22 December 2012

Hastings 1066: medieval scenarios page updated

I've just added this one to my Medieval Scenarios page, which you can find on the left of this page.  Mark says that our esteemed president of the Society of Ancients has asked for refights to be tried, and this will be our offering, aiming at some time in January.  I have Normans and Saxons, although maybe not enough, so I'm hoping that Gordon and Graham will be able to contribute.  Both of my armies are rather old and tired, and badly need sprucing up (a lot!), bit they'll do.  I will see if I can put together some command stands to add some colour, in between batches of Iberians.

Yet another Successors Clash

If these guys could stop fighting, they might conquer the world.  Or something like that.  The Ptolemaics attack Asia Minor and encounter a Macedonian army in a bad mood.  The photos aren't great, but they give an idea of what happens:
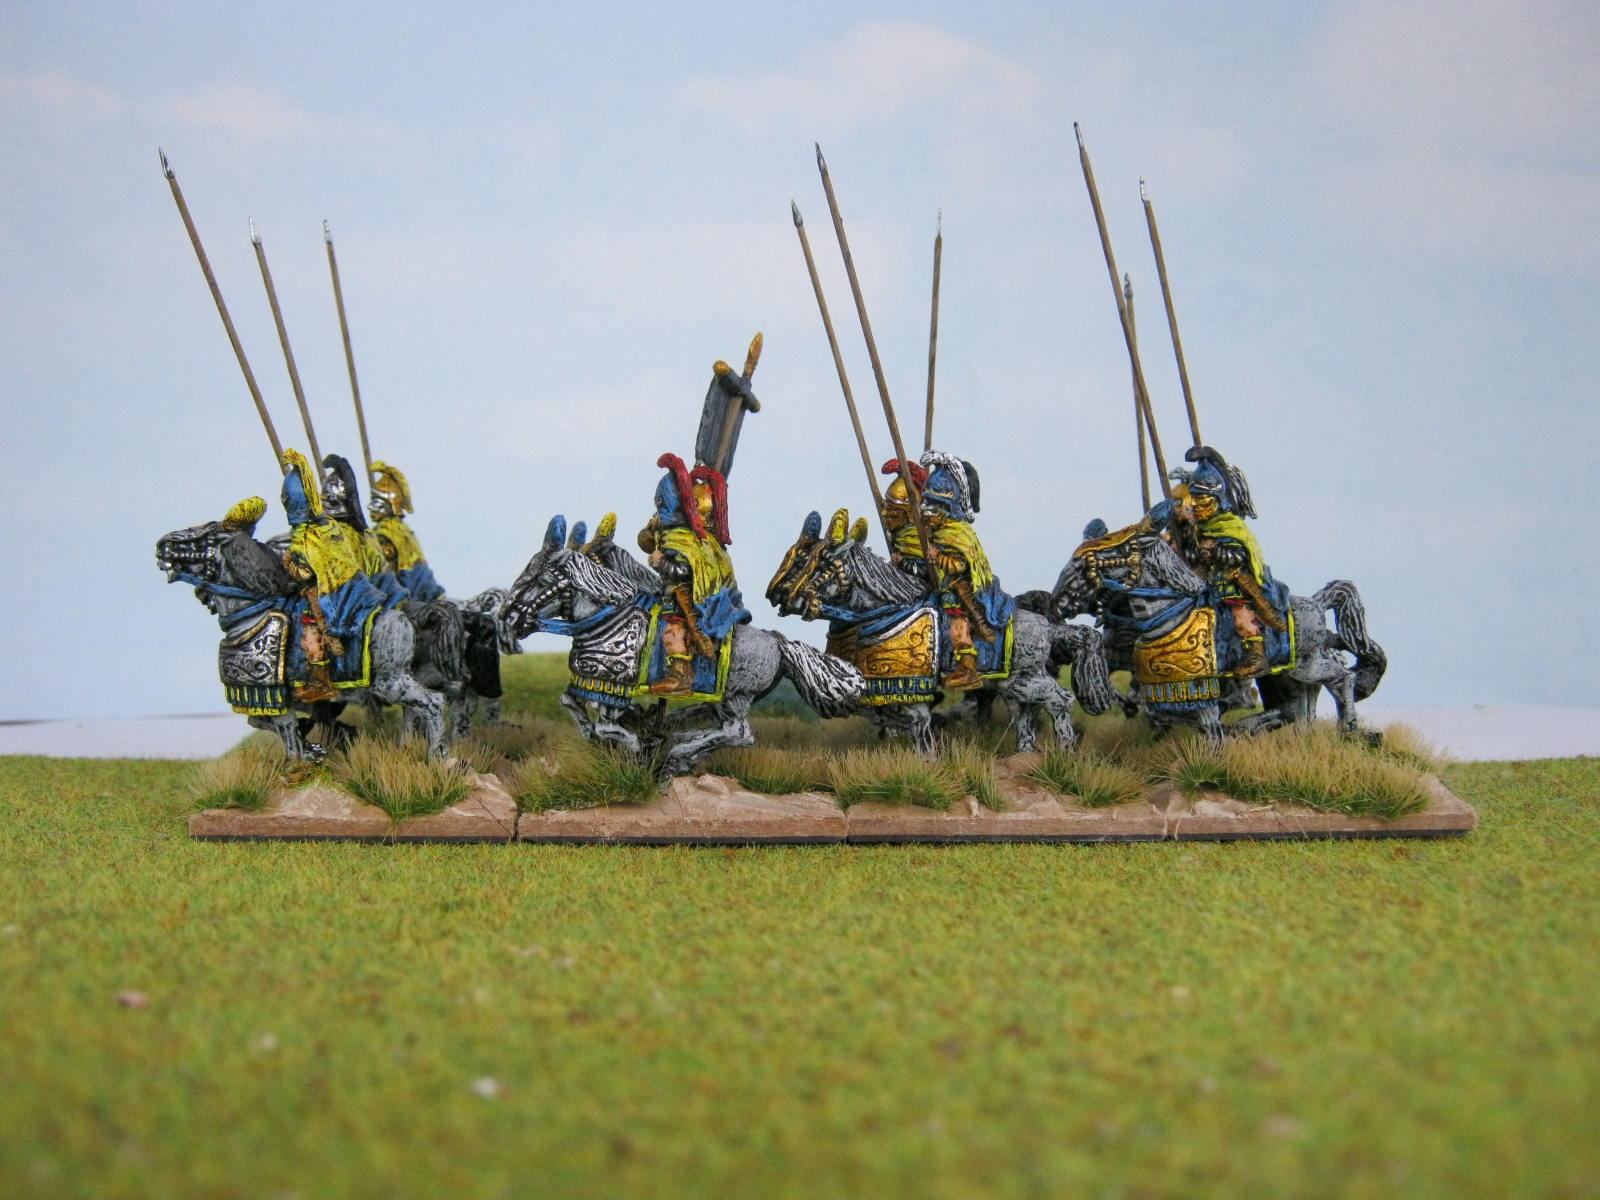
I construct and play the Macedonians; Simon builds the attackers, and Gordon plays them.  The first photo (above) shows Gordon's right wing from my perspective: light infantry, a load of men on funny smelling pseudo-horse things with a hump; elephants; and some medium horse.
The enemy centre is composed of a powerful phalanx deployed deep, with some more light infantry to either side of it.
Their left has a large unit of elite lancers, elephants, light horse and even more light infantry.  They have many skirmishers spread across the front of the army.
My left rests on some rough ground, which is occupied by light infantry.  I have also placed some light horse here, and two units of heavy cavalry.  Some good quality Thracians complete this command.
The centre phalanx is very strong: six units of 36 pikemen.
My right also rests on some rough.  Here I have a small unit of elite phalangites, some more Thracians, light horse and light infantry.  I also have a large unit of medium horse in reserve.  Like the opposition, many skirmishers are placed ahead of the main lines.
The enemy comes on apace.  I hold on my left.  In the centre, I advance the phalanx en echelon, leading with the right.
On my right, I angle the elite foot a little to watch the flank of the phalanx, while pretty much holding with everything else here.  Gordon has thrown his guys wide.
Above is an angled shot of most of the field at this point, taken from behind my right wing.
My left is under threat from lots of camels and elephants.  I'm just going to have to sell my troops dearly here; the rough ground should also help.
Meanwhile, on my right, I send my elite foot wide to counter Gordon's developing attack.  I keep the medium cavalry in reserve.
The enemy closes on my left.  I put the Thracians in the way of their cavalry to try to break up the attack a little.
At my centre right, my phalanx has taken the hill.  The guards are now pressing Gordon's lancers backwards.
I now feel safe enough on my right to commit the reserve cavalry.  The push of pike in the centre of the field is getting me nowhere fast, so I decide to send the cavalry into the centre rather than reinforce my right.  It is a calculated risk, since I am relying on the remainder of my troops here to keep the opposition occupied just long enough...
Gordon does start to win through on this flank, but I am hoping that his victorious troops are too far out of position to threaten my central infantry.
My cavalry continues to advance at an angle towards the centre, while my Thracians continue to hold out against the enemy elephants at my right.
Meanwhile, on my far left a stalemate breaks out.  My heavy cavalry have been engaged by the elephants just off to the right of this photo, but Gordon doesn't roll well here and my numbers cancel out his weight.  My Thracians here have been destroyed, but they took the enemy cavalry with them.
I advance my extra phalanx off the hill, allowing space for my reserve cavalry to arrive at the left of the enemy phalanx.
Despite their arrival, Gordon's morale holds.  Maybe I'm going to be too late...
The end enemy unit holds on to the last men, and then the cavalry lawnmower continues its relentless advance along the phalanx's flank lines.
And just in time too as parts of my own phalanx start to crumble.  But it's all over for the invaders as the cavalry crushes another phalanx unit.

A good, hard game, made all the more fun because neither of us really cared about who won.  Plenty more Successors where these came from...

After the battle finished, Mark and Gordon rolled to see what transpired next in the campaign.  Hannibal has recruited some Celtiberians in Spain to try to hold out against the expected Roman attack, and the Macedonians have counterattacked against the defeated Ptolemaics.  So that's the next one we play, in January.

Wednesday 12 December 2012

Another Campaign Update

Yesterday evening we played another Indian vs Successors game.  No pictures this time, because I had to re-pack everything in a rush to get to the club, so I didn't take the camera.  Suffice it to say that the Indians are on a roll, crushing another Bactrian Greek army and taking Parthia.  This counts as the Persian homeland, because it will be where the Parthians rise to power in the future, so in effect the remnants of the claimants to Persia are reduced to a single bastion in Persia itself.  A major victory for Simon, with Graham and I on the losing side.

Graham then rolled a series of campaign events.  The Romans have restocked in preparation for their next assault on Iberia, and have also walked in and taken Sicily unopposed.  We rolled for that one instead of playing it on the tabletop, since its rebellion left it as a minor state with no friends.  The Parthians have kept their first point towards rebelling, rather than trying immediately with only a 1 in 6 chance of success.  Next week's game will be an aggressive Ptolemaic incursion into Macedonian-controlled Asia Minor.  After that, we have a two-week break for holiday time.  If I'm lucky, I might have some Spanish completed in time for the big battle that is looming between Rome and Carthage.

Monday 10 December 2012

Hi Jonathan

..and thanks for joining.  Jonathan's blog is here and I'm jealous, because he has some of those lovely Relic figures!

Saturday 8 December 2012

Iberian Command Stands

Finally, I have managed to do a little bit of work towards my Ancient Spanish:
These are the first of a whole load of the old (now defunct) Companion Miniatures figs.
They will serve as a couple of infantry command stands.
They are nicely animated, and there is a really wide range of figures for this army.
Transfers are by Little Big Men.
A top-down view of the basing, to finish off.  I have really enjoyed painting these guys, perhaps because they make such a change from Romans and Hoplites.  It's probably just as well, because this is going to be a big army.  There will be four units of 48 Scutarii, and that's just for starters.  Once I'm done, I've promised to let several people know about whatever I have left over.  These figures are rare...

Empire Campaign 210-200 BC

This turn saw plenty of action:


  • At the highest point of \Hannibal's success in Italy, Sicily rebels from Roman control.
  • The Seleucids hold firm against an attack by the Bactrian Greeks to their east.
  • The Ptolemaics defeat an incursion by the Macedonians.
  • Scipo advances against Hannibal, who retreats before him.  In quick succession, Hannibal is thrown entirely out of Italy and Transalpine Gaul.
  • In a great battle in Iberia, Hannibal stems the Roman tide.  But for how long?
  • The Carthaginians and Romans both regroup for the next round of their grim struggle.
  • In the east, the Indians conquer Bactria (again!)
The map now looks like this.  Western half:
Eastern half:
The photos aren't great, because I covered the mapboard in plastic to protect it, but I hope they give an idea of how the strategic situation looks overall.  The deluxe components of the Lost Battles game are impressive, and expensive, so I want them to last as long as possible.

There are no appropriate rebellions to be applied for the next turn.  First up will see the Indians attempt to grind forward even further into Parthia.  Their opponents are still the Bactrian Greeks, but they won't have so many elite or heavy troops.

The Indians Rouse Themselves

...and attack Bactria with a large force of elephants.  Gordon has kindly supplied a diagram of the deployment he devised for the Indian army:

This has been put together from the viewpoint of the Indian commander.  The Greek colonists on the defence have found a couple of hills on which to nestle, plus a shallow stream down one flank.  Photos have been taken from the other side of the field, because that's where I was:
The initial shot of the elephants didn't come out well, but you'll see them in all their glory soon.  The first photo, above, is of the Indian centre as seen by the defenders; Indian army supplied by Simon.
Next is the massed chariotry and cavalry on the Indian left flank.  Gordon ran the right half of the army, Simon the left.
Willy deployed the defenders.  I was put in charge of the left wing, mostly cavalry with a small number of elephants and light infantry.
Willy ran the massed phalanx in the centre, as is his wont.  The usual cry went up: "Ramming speed!".  Willy likes pikes...
Mark ran our right, which was of similar composition to my command.
One of us was bound to get the short straw, and this time it was me.  Unlike the chariots and mediocre cavalry facing our right, the photo above shows what I was up against.  I would try to die as slowly as possible...
I stayed put; Willy charged; and Mark tried to position his forces as best he could for the attack.   The photo above shows his wing after turn one.
Above is my attempt to get in some shooting with my horse archers.  They aren't very good in combat against elephants...
To the right of the stream, I jiggled my forces a bit to try to give them some room.  I need to last as long as possible.  Willy's phalanx can be seen advancing into the distance, heedless of any danger to their left flank.
Mark's advance on the far side, with horse archers moving ahead to shoot anything they see.
The centres close.  Willy has the advantage to his front and right, but his left is very exposed.  There's just no way I can protect it with all that jumbelry rumbling towards my cavalry...
Mark threatens the enemy left.
Those elephants are getting far too close...
My lone unit of elephants charges into a block of Indian foot that has advanced quite far.  Result: nowt.  At the top of the photo, you can see Gordon's standard battle manoeuvre taking shape: swing the second line of the attack into the centre.
A close-up of my Nellies in inaction.
Another close range picture, this time demonstrating the developing threat to the left flank of Willy's infantry.
Willy's centre is having a good time, although they will need to win quickly if they are to avoid being rolled up from the left.
Marks is beginning to destroy his opponents quite nicely indeed, thank you very much.
And here he is again.  Simon's aim here is the same as mine, to slow down the opposition, which he manages.
Elephants making a mess of my command.
Mark crunches victoriously onwards.
I lose ingloriously.
The left of the phalanx collapses, and it's all over bar the shouting as our centre is rolled up in spectacular fashion.
Last up is Gordon's plan of the action, which pretty much sums it all up for us, with all those blue lines showing elephants moving into the centre.