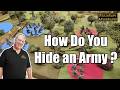
The Indians attack into Bactria. They encounter a defending army in an area that mostly consists of plains, with a large low ridge in the centre, somewhat favouring the defenders:
Simon constructed and set up the Indian invaders (in blue at the top). He went for a symmetrical formation: three large blocks of 48 foot archers interspersed with two columns of 4 elephants and two columns of 4 chariots. A column of 18 cavalry was at either end and a dozen skirmish javelinmen in front of the army's right. Paul commanded the right, Billy the centre and Simon their left.
I built the defending army, but left the actual unit compositions and deployments to Gordon, because he said he had a plan. He commanded the main strike force on the left and left centre of the line: two units of 18 medium cavalry in line, two units of 12 peltasts, 2 units of 12 elite Companion heavy lancers, and two units of 2 elephants. David controlled the central phalanx of four units of 36 figures in three ranks. I had the light troops on the right wing: four units of 8 Arachosian horse archers supported by two units of 12 peltasts. Various small units of skirmish javelins were out front. Photos of the action:
 |
| I just had to take a close-up of some of Simon's rather lovely Indians. |
 |
| And another, this time of the infantry. |
 |
| Gordon advances on our left big style. |
 |
| An angled shot of the centre of the field at the same time, taken from my position to the right of our army. |
 |
| Since my troops aren't facing very much, I place all of thre horse archers together and advance to the right of the phalanx. |
 |
| Above: a large melee between the mounted troops on Gordon's far flank. However, the Indian infantry continue to advance just to the right of this shot, opening up a gap between them and the mounted wing. |
 |
| Gordon sacrifices one unit of Companions to hold the enemy infantry in place while the other breaks through the gap (at the top left). |
 |
| The centres close. Indian archery is beginning to hurt the phalanx, but will it be enough? |
 |
| The same time, more to the right. Simon has angled his endmost infantry unit and chariots to ward off my hordes for as long as possible. |
 |
| My horse archers press forward into the open space on this wing. |
 |
| The central clash. By this point, fighting is pretty much general along the entire line, except on my flank. |
 |
| The fighting at my end of the phalanx. I have thrown in some of the Arachosians to help out against Simon's chariots. |
 |
| However, at the far left of our centre the Indian foot destroys the Companions. |
 |
| Even so, Simon sees that the Indian cause is crumbling fast because the centre is making no real headway. He advances his cavalry on my flank to try to ease the pressure. I promptly surround them with horse archers. |
 |
| Some more success for the Indians at our left of centre. One of our elephant units breaks, and disorders the other. |
 |
| Unfortunately for the Indians, however, their victorious elephants break through in an uncontrolled advance. If they had obeyed orders, they would be able to wheel more into our centre. |
 |
| Remember that spare unit of Companions? Here they are crashing into the rear of the enemy infantry, doing what Companions do best. |
 |
| The Indians are crumbling at my end too - here the demise of the end chariot unit allows two phalanxes to gang up on one Indian infantry unit. |
 |
| And at the same time my horse archers and light infantry swarm into the centre. |
Game over - a crushing defeat for the Indians. It was good to be able to take photos of Simon's Indian army, which I haven't seen on the table for a long time. Next up is the final battle of this campaign turn: the Romans attack Carthage in Sicily again.


.jpg)


.JPG)


Another excellent battle report. Well done
ReplyDeleteGreat report - like the shot of the beer as well!
ReplyDeleteCheers, both. The beer is kind of becoming a signature, a bit like Hitchcock appearing in his own movies...
ReplyDeleteThat's a lot of lil men
ReplyDelete