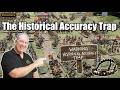
Report on our Society of Ancients (Scotland) battle at our traditional venue of Carronade in Falkirk. Some photos by me, and some courtesy of Michael.
The first picture shows the relative army deployments. On the left, we have the forces led by Attila. Off in the distance is a small command of Huns tasked with masking or taking the only significant terrain feature, a steep hill in front of the Roman deployment area. Moving more into the centre we have the Ostrogoths, and then waves of Huns. In the immediate foreground at the left of the photo are the Heruls and Gepids. On the right, the Roman forces are already beginning to move. At the far end of their line is a detached command of Visigoths at the hill, then the main Visigoth contingent of
Foederati. In the centre of the army we have the Alans, with Aetius close by. In the foreground at the right are the only Romans on the field. The deployment is pretty much the same as in our previous playtest game at the club.
Most of the subsequent shots are taken from behind the Hun lines, because that's where I was stationed. Above, the Ostrogothic cavalry shifts to the left of the army.
In the centre, the Huns advance to engage the Alans in an archery duel. You can probably make out some acetates on the field - I decided to print command information on clear plastic instead of card or paper, to try to keep disruption of the photos to a minimum.
Picture number three is taken a little later, as the Ostrogoths sort themselves out. Unlike the previous game, the Romans have advanced en masse, rather than rely on the time limit to win it for them.
In the centre, arrows darken the sky.
On the right, the forces close.
On the far left, the Huns plus Gothic foot archers open up a killing zone with lots of bows aiming up the hill.
In the centre, the Huns do exactly the same against the advancing Alans. This is the second major point of difference from the first game - the Huns are going to use their archery superiority rather than physically attack the Alans.
A massive crunch on the right. The legions in the centre of this area do not receive the initial charge very well.
Michael's close-up of the action here. Graham did supply some Late Roman infantry, but they are based somewhat differently from our usual. Hence the Hinchliffe Skutatoi standing in for their earlier brethren.
Michael also took this shot of the entire field at the same time. You can clearly see the struggle in the foreground between the infantry masses, and the arcs of fire elsewhere in the battle.
After weakening the enemy on the left, the Hun forces make their attack. Gordon's newly painted Gothic cavalry make their first ever charge in the centre of the photo above.
Another photo of the same moment, slightly more to the right.
The Alans press forward under a hail of arrows. To the right of this photo you can just see Aetius charging in to try to shore up the infantry on the left of the Roman army.
The left of the Hun army is victorious.
On the right, gaps are starting to appear in the Roman lines. One legion is destroyed, and other is barely hanging on, but the attrition on the Gepids is horrendous.
Suddenly, the Gepids rout in their entirety, leaving Adaric defiant with the mangled remnants of his personal guards. With only two hits left, he leads a grand final attack on the reserves behind the Roman lines, determined to take as many of them with him as possible. Such glorious futility...
As night falls, the Huns try desperately to finish off Sangiban's Alan nobles to win the battle, but it is not to be. With only one hit left, he survives.
Both sides had only two army breakpoint units left, and if the Huns had managed to destroy Sangiban and his men they would have won the battle with the last throw of the dice. But darkness saved the Romans. This was a much closer game than the previous outing, with the historical outcome left intact (although not quite how it really happened). We might get a third chance for the Huns to win it later this summer.


.jpg)


.JPG)

.jpg)


+(1).jpg)
+(1).jpg)


Very impressive, Paul!
ReplyDeleteSmon
Great looking clash of arms! Tha battlefield is really nice, and your figures just wonderful...
ReplyDeletePhil.
Great looking game on the day Paul, well done to you and the crew. The big clash in the centre looked spectacular and certainly photogenic.
ReplyDeleteHope to get a chat next time or maybe Wappinshaw if your going to be there.
Cheers Rory
Thanks for looking. I'm not yet sure whether I'll make it to Wappinshaw (trying to buy a house right now). But then again, I might need something to take my mind off it!
ReplyDelete