Showing posts with label Phoenix Nights. Show all posts

Saturday, 28 September 2013

Titanic Struggle in Greece

The Romans and Macedonians go hard at it again in Greece.  The Macedonians, led by Philip V in person, attack the Achaean League, and the Romans send an expeditionary force to help their allies, consisting of a proconsular army of four understrength legions.  The last time this happened, the Macedonians won because the Greeks all ran away; who knows what the outcome will be this time...
Above is a shot of the Macedonian right, as seen from my perspective behind the Roman lines.  Two waves of light horse, some heavies, and a load of Thureophoroi types.  Skirmishers out front.
The Macedonian centre: a large heavy phalanx, with their guards held back.  Note the celestial radiator behind them...
Their left: more phalanxes, with heavy cavalry and skirmishers.
The left of the allied army is mostly the Achaeans, with me in charge.  Light and heavy horse, and Thureophoroi.  Just at the right of this command are the Latin Triarii, deployed wide instead of in support of the other legionaries.  This is a new-fangled formation devised by some guy named Scipio...
Romans, looking like Romans.  The middle of our array.
Our right: Roman Triarii, Achaean thureophoi and the amalgamated Roman and Latin equites.  Some more peltasts are ready to go into the rough.
A full table shot of the army deployments from off to the Roman right.  Whatever the outcome, this is going to be nasty...
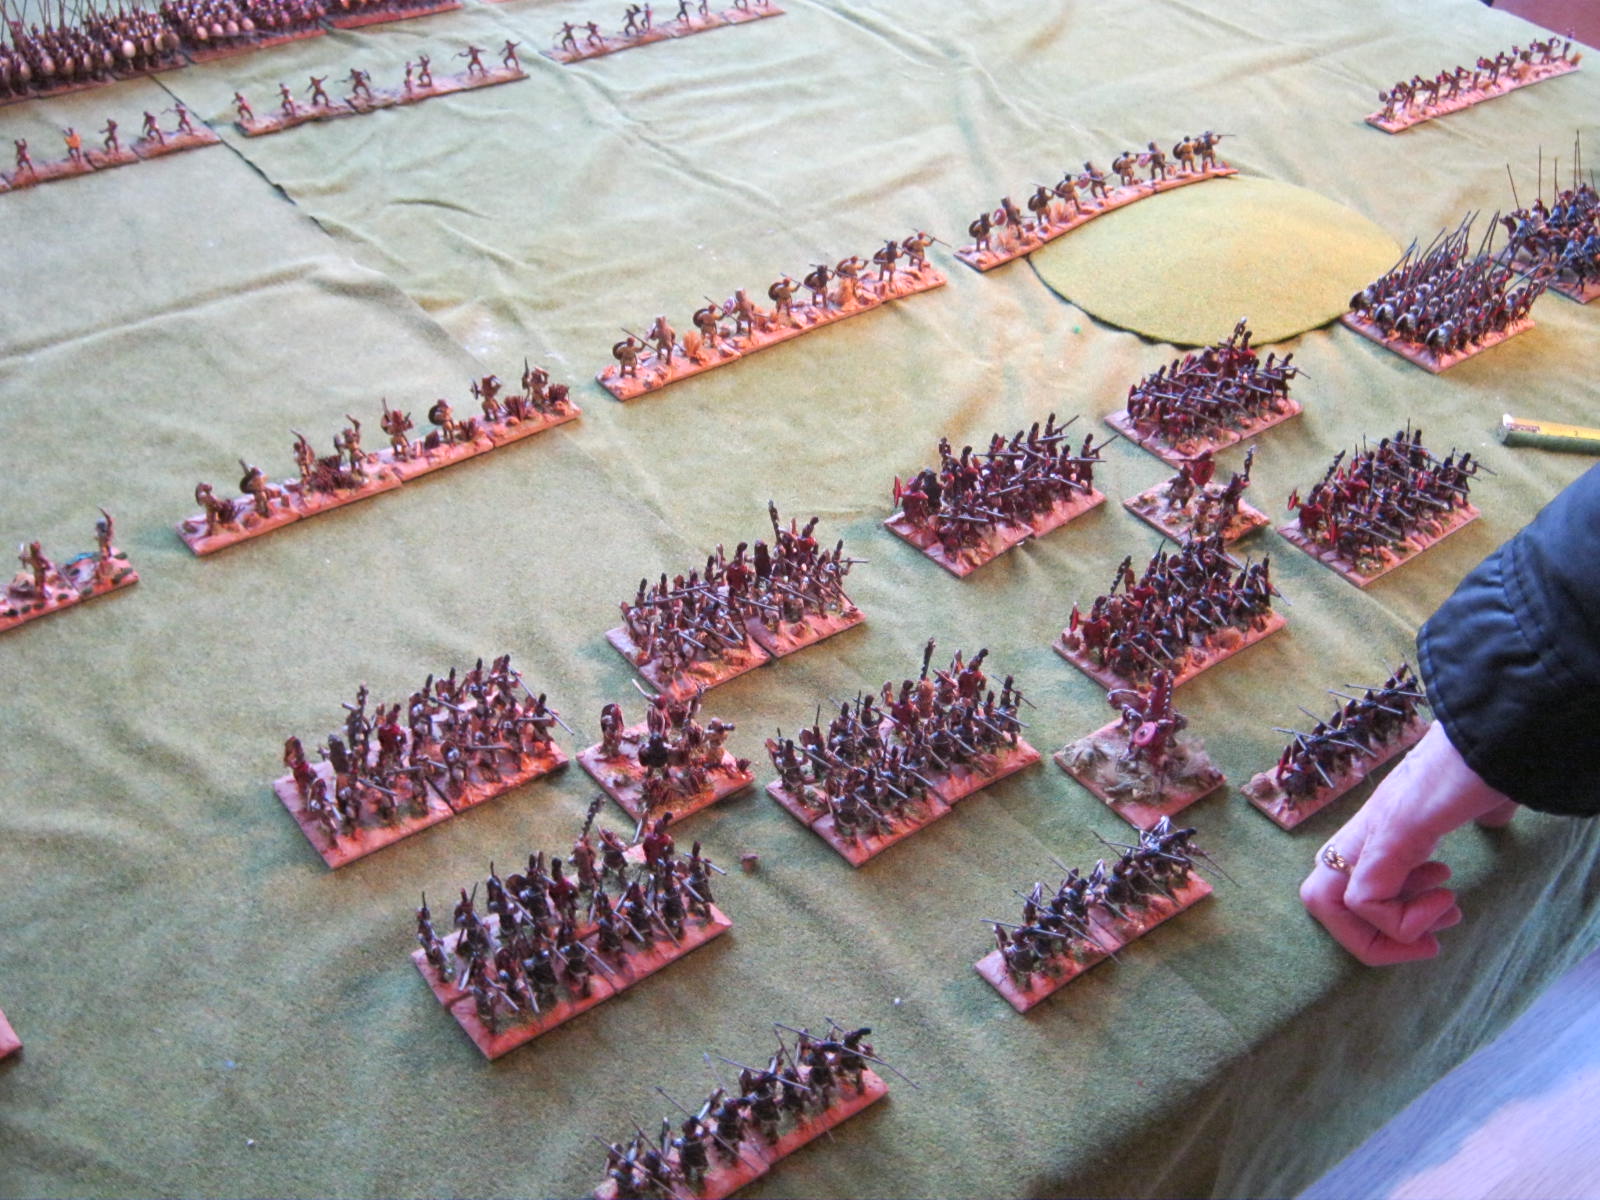
The one above is an angled shot of the enemy phalanx.  Deadly impressive.
A closer shot of the legions from the same perspective.  Damned well drilled, these barbarians.
Final photo from this end of the field: the armies advance.  It's a bit blurry to see details, but it does give an idea of the sweep of the game.
The same moment, this time from beside my command of Greeks.
I'm first into combat as my light cavalry takes on theirs.  Right in the middle of the photo you might be able to make out the enemy guardsmen.  They have moved out to this end of their phalanx to face off against the Latin Triarii.  This will be the point of decision, because if the guards do not hold out, the flank of the phalanx will be turned before its weight crushes the legions.
The aerial shot should give some idea of what I'm on about.  In the immediate foreground the Latin hastati have already engaged the guard pikemen.  Just off to the bottom of the photo the Triarii are crunching enemy Thureophoroi.  Once that's done, they can join in here, but the timing is going to be tight.
This is the action right at the extreme edge of my flank, with the battle stretching off into the distance.
A terrible struggle ensues on my flank.
The Macedonian foot guards have disposed of the Latin hastati, and not the Principes go in.  The remainder of the Romans are having a bad time in the centre of the army.
The wight of the phalanx is beginning to tell at the far end of our army.
Above is a close up of the Roman right having a bad time.
The enemy right wing collapses and the Latin Triarii are free to hit the Foot Guards.

But it is too little too late, as the phalanx grinds it way through the middle, despite King Philip getting himself killed right in the middle of the line.  Another expensive victory for Macedon.  But it is a short-lived one; the Romans counterattack with a full consular army and crush the Macedonians.  I have no photos of this one, because I forgot my camera, but it wouldn't have mattered anyway because we were in a different part of the hall and the lighting was crud.

Next up: at the start of the penultimate turn of the Empire campaign, Gallia Narbonensis rises in revolt against the might of Rome, so that should be fun...

Thursday, 12 September 2013

Indians Crush Persia (and a large map)

Just a short entry to remind myself of the game we played on Tuesday, mostly in semi-darkness due to the lighting at the club being on the blink.  So no photos then, which is a real shame - I remembered my camera this time because I really am determined to take better pictures of Simon's Indian army, but it was not to be.  Anyway, it was a game of two halves.  I was up against Simon, and Gordon faced off his part of the army against Billy.  I did very well indeed, or rather Simon did badly because of his dice; on the other wing, Gordon moved into position to crush Billy.  It looked as though we were going to walk it.  And then Billy started rolling dice and it was game over for us.  His guys were in a really bad mood.  Anyway, that means that the last remnants of Persia have now finally been removed from the map.  There are only two moves left in this turn, and then two more turns, so the campaign is mostly beginning to wind down.  The main area of action will be in and around Greece as the Macedonians and Romans come to blows...

After that, we'll do an Empire Victory Points calculation and move on.  I have a cunning plan for this:

This is a digital map of the Roman Empire and beyond that I found on a Total War forum.  I've completely recoloured it using MS Paint, the idea being to use it as an electronic resource for a more intensive campaign charting the end of the Roman Republic and onwards.  I'll also print off a large scale version for handy use at the club.  Do feel free to blag it if you like!  The plan is to colour in the borders between powers as they shift.  Once the Empire campaign is complete I'll update this map to reflect the position of the various states at that point, and we'll take it from there.  Might as well keep going now that we've started...

Sunday, 1 September 2013

Successors against Galatians

Finally, it feels as though we are getting back to something near normal.  I managed to take a full set of photos of our campaign game last Tuesday, as the Ptolemaic Successors mounted a counter-offensive against a large Galatian incursion into Syria:
First up is Willie, proud commander of the Galatian right flank, as seen from our side of the table behind the safety of the central phalanx.
The Galatian centre was a huge, deep mass of warriors.  Figures courtesy of Simon.
Their left wing was relatively sparse - some skirmishers and light horse skulking in the vicinity of a low hill.  There is no plan as such - it's obviously just going to be straight in with the warbands.
Above is a purely gratuitous shot of the loonies in all their glory - an impressive sight indeed.
I was deadly dull and boring.  I deployed the Ptolemaics in a sort of balanced array, with the pikes in the centre and two reasonably strong wings of horse and other types on each wing.  The shot above is from my perspective as commander on the right of the army.  David controlled our centre, and Gordon took the far side.
The armies close.  I charged on our right against my meagre opponents with a combination of light and medium horse.  I also threw our elephants straight towards the outermost warband.  The phalanx advanced en echelon and then the majority of it halted to await the inevitable loopy charge.  Gordon was just as aggressive on the far wing as I was on mine.
Gordon managed to use our endmost unit of pike to force the enemy chariots to retire, and swung both units of heavy cavalry into the centre towards the rather inviting flank of the infantry horde.  You can probably see what's coming...
I have cleared my flank, and attacked the Gallic infantry here with a combination of elephants to the front and medium cavalry in the flank.  This doesn't seem to bother them, though, and their morale holds out turn after turn as I grind them down.
The next warband in from my side is led by the chief loony in person, but I manage to slow him down a bit with judicious use of peltasts, the Ptolemaic sacrificial type of choice.  The rest of the pikes shrug off the main assault, and Gordon's heavy cavalry start to destroy everything in front of them.  Billy, in charge of the warbands, rolled really well for morale all evening.
However, the weight of Gordon's heavies was simply too much as they munched their way through the first warband...
...and then a second.  Game over for the Galatians, caught in a double cavalry envelopment.

Next up will be the Indians attempting to go further than they managed in real life, against those pesky Persian loyalists again.  Last time was an easy victory for the plucky defenders, but maybe their time is finally up...

Friday, 23 August 2013

Empire Turn 17, 190-180 BC

Finally completed this turn, months after starting it (in real time!).  The gap was due to a very hectic summer, including a house move which is now complete.  Just need to sort out where everything goes...

No picture of the map, because I don't have a printer/scanner.  My old one died on me, and we haven't got round to buying a new one yet.  Anyway, not much has changed on the strategy map this turn. Events (in order):

  • Greece rebels from Macedonian control
  • The Macedonians defeat a Ptolemaic attack on Asia Minor
  • The Macedonians crush the revolt in Thrace
  • The Macedonians defeat a Roman army in Greece, mainly because the Greeks run away.  Greece, however, remains uncontrolled.
  • The Persians handsomely defeat an Indian attack
The last event was the game we played on Tuesday.  I don't even have photos of that, because the camera is still in a box somewhere.  A bit of a shame, because Simon's Indian army is rather lovely.

With the new turn, the Parthians have accrued three points towards independence, and Carthage has two; eventually one or other will choose to roll to see if they emerge as powers in their own right.  Mark rolled for rebellion at the start of the new turn, and Syria has escaped from Ptolemaic control.  The first move of the turn is an attempt by an army from Egypt to bring the rebels to heel.  We are a bit jaded with all those Successors games, so we are going to try something a little bit different: Ptolemaics against Galatians, using Simon's Gauls.  Should be fun...

Sunday, 5 May 2013

Culture Shock In Greece

The Greeks have rebelled against their Macedonian overlords, and invited in the newly rising major power of Rome to try to avoid retribution.  The scene is set for another clash of civilisations - well, in so far as those western or nothern barbarians can be called civilised...
The first photo shows the left of the Roman army (me in charge): skirmishers and some Greek light horse and peltasts out to the left of the combined equites from the Roman expeditionary force.
Next up we have the legions, in their traditional triplex acies (consul Billy in charge).
To their right is the majority of the allied Greek contingent: a large medium phalanx, some heavy cavalry; thorakitai, light cavalry and skirmish slingers (Paul in command).
The Macedonian right, from my perspective: a powerful command of light horse, elite heavy cavalry, and thureophoroi, with expendables out front.  Simon is in charge of this lot.
Gordon is in command of the central phalanx, but the photo was pants so I won't bother.  Above is Willie in charge of the Macedonian left wing, which is basically a mirror image of Simon's troops.
I took the photo above from off to the left of my command.  The initial moves have been made.  I am hanging back to prolong the moment of contact for as long as I can, since I am weaker here than Simon on the other side.  The legions have advanced in the centre, and at the far end of the table you can just about make out our Greeks racing forward - our Paul has superiority of force there.
Romans versus phalanx - a meaty combination.
Paul's guys race into contact and lose spectacularly.  No gamer is immune from what we call the wild dice syndrome: occasionally a situation arises where your dice are rubbish in one part of the field, and the enemy's dice are spectacular, and the combination wipes you out.  Tonight it is the turn of the Greeks to feel the wrath of the dice Gods...
Back on my wing, my troops are selling their lives dearly.
The fight grinds on in the centre.  The much-vaunted Macedonian phalanxes are having a really bad time against the legions.
But the Greeks have all run away, leaving the Roman right hanging in the air.  Notice the hand of Fortuna hovering over the victorious enemy peltasts!
My guys are crumbling.  It looks as though the Romans are going to be on the receiving end of a double envelopment...
Having said that, the two rightmost legions are crushing every phalangite they can find.
But it's not enough, as the weaker enemy triumphs over the Greeks,  Or would do, if they could find any of them.  A victory for the Macedonians ensues, as they turn into the centre and destroy the legions at the cost of two entire divisions of the phalanx.  The Roman expeditionary force is no more, and the Macedonians return to Pella, muttering about horrific belly wounds caused by nasty swordsmen.  The field is clear for a proper Roman return, but only time will tell if that happens before the Macedonians regain their strength and get the Greeks first.  One thing is sure, the Romans now have nothing but contempt for Greek military capability!

Next up, though, is a break from the campaign as we take Chalons to Carronade this Saturday.  When we resume, the Indians will be trying to wipe out the last remnants of pro-Persian power; we'll probably use the Later Seleucid army for that one, given the date and place.  Sure should look pretty!


Saturday, 27 April 2013

Thracian revolt crushed

On Tuesday, we played the latest in our Empire campaign: the Macedonians attacking Thrace.  It was one of the most gloriously satisfying massacres I have ever been handed - I lost in spectacular and hilarious fashion. Everything that could go wrong did do go wrong - commander killed, centre crushed and lots of Thracians wiped out.  There is something therapeutic about such a cleansing experience, especially when it's a relative sideshow in campaign terms. The outcome didn't bother any of us very much, but it was just great fun to play.  No photos, because time was tight and I didn't dig out the camera in advance.  Next up is scary: the Romans have finished with Carthage and have now landed in Greece, which has also rebelled from Macedonian control.  The Romans with Greek allies are about to meet a Macedonian field army, so the Macedonian Wars are about to begin in earnest...

Saturday, 6 April 2013

Battle of Chalons: Club 1st Tuesday Game

It was the turn of our group of ancients players to host the traditional multi-player game on the first meeting of the month, so we tried out the scenario for Chalons.  This is a scaled down version of my original; thanks are due to Simon MacDowall for graciously allowing me to adapt his scenario.  Map of the field:
The Hun army is in red at the top of the map.  It is composed of a confederation of Huns, Heruls, Gepids and Visigoths.  Commands are as follows:

Right Wing: a column of 18 Gepid and Herul heavy lancers; 18 Gepid light foot bowmen; a large warband of 48 Gepid foot warriors; the Comitatus of King Adaric, led by the man in person (24 elite Gepid warriors); and another large 48-figure Gepid warband.

Central Initial Wave: 5 units of 8 Huns

Central Reserve: 4 units of 8 Huns and a unit of 12 Hun nobles led personally by Attila.

Left Wing: the Ostrogoths of King Valamir.  Two large columns of 18 heavy lancers to either side of a large unit of 48 foot, with 18 light foot archers off to the side.  Valamir leads a reserve of 12 elite heavy lancers in person.

Hunnic detachment: two units of 8 Huns with a unit of 12 Hun nobles


The Romans, in blue:

Extreme Left Wing: 18 Elite Heavy Cavalry led by the Comes Equitum

Left Wing: 32 Elite Auxilia Palatina in column; two Legiones of 36 figures, including integral archers; and 32 Frankish loonies in column.  A second wave is comprised of 24 Limitanei Militia Grade troops and 24 German foot.  This large command, which is the most 'Roman' part of the army, is led by the Comes Peditum.

Lurking at the rear: Aetius with his Bukellarii, 12 Elite Heavy Cavalry.

Centre: two units of 12 Alans and a large unit of 18 Alan Nobles led by King Sangiban.

Right Wing: the Visigoths of King Theoderic.  Two large units of 36 Visigothic foot (including integral archers) are deployed to either side of the King's Comitatus, led by the old king himself (24 elite warband).  There is a small reserve of a dozen heavy horse to the rear.

Detached command: Theoderic's son Thorismund leads two units of 12 heavy cavalry, with an advanced screen of 12 skirmish archers sitting on the large steep hill to the front right of the army.

The battle starts late in the day, with only six full turns of daylight left.  Turn 7 will be dusk, and night falls at the end of Turn 8; these final moments will see progressive penalties applied to movement, shooting and melee.  Each army has nine breakpoints, with each unit and each general counting as one point.  The light cavalry and light infantry archers in the Hun army are worth half a point.  If neither army is victorious by nightfall, the Romans win by default.

The Romans can therefore afford to play a holding game, although they have placed a detached Visigothic command off towards the high hill, which is the only terrain feature present.  The Huns have likewise detached some troops in the same direction.

Some photos of the starting deployments:
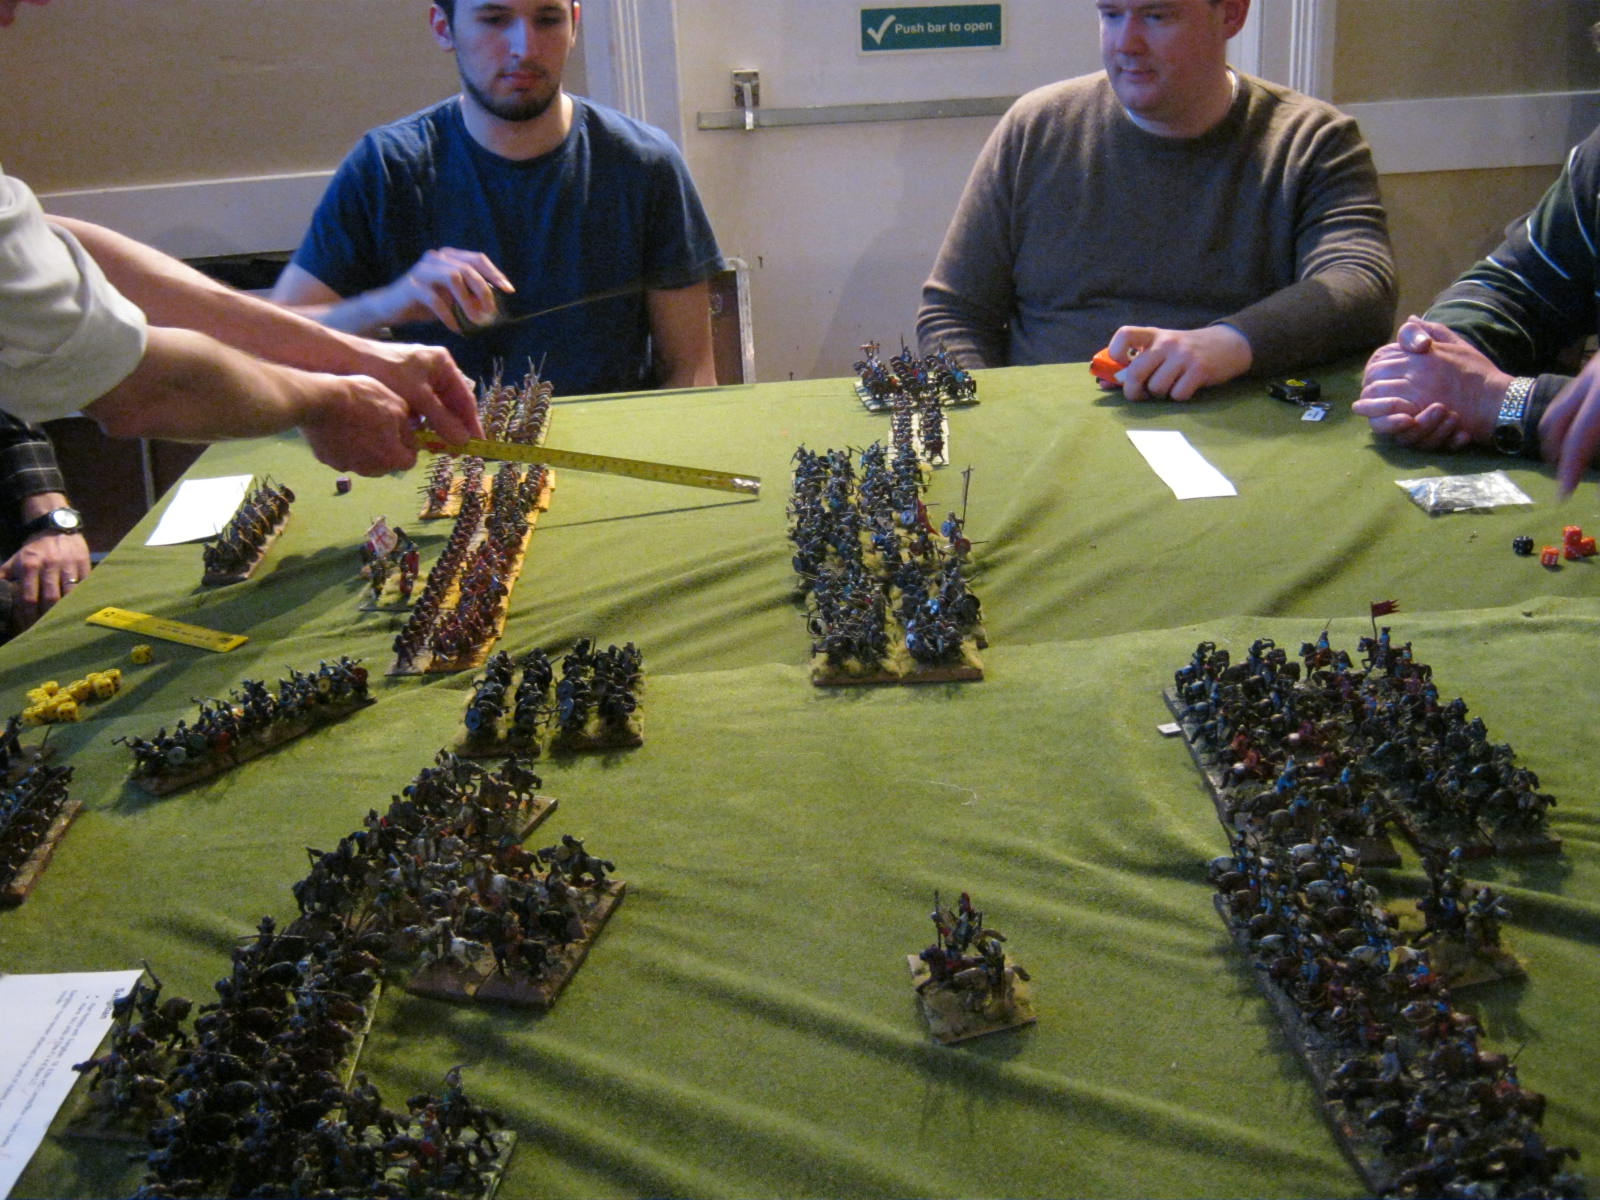
First up is a shot of the entire field, taken from the Hun right flank.  Huns on the left of the photo.  My old Hinchliffe Skutatoi are standing proxy for the legions at the right of the shot.  We were able to fit in a dozen players, by giving the Gepid foot archers and cavalry column in the immediate left foreground to another commander.
Above is the Roman right wing from the viewpoint of a Hunnic helicopter pilot.  In the centre of the shot are the Visigoths, and a unit of Alan light cavalry can be seen to the right of the photo.  The reserve heavy cavalry is angled towards the supposedly open flank.  As umpire, I left the cavalry behind the hill off table.  Thomas is obviously deeply interested...
Photo number three shows the Alans in the centre of the Roman army, with Aetius lurking at the rear.  He is rather close to Sangiban - maybe he doesn't entirely trust him...
The final photo of the Roman deployment shows their left wing, the only Romans in the army.
Above, you can see the left of the Hun army: detached Hun cavalry to go wide if the need arises, and then the Ostrogoths as you look more into the centre of the army.
The centre: two massed waves of Hun horse archers, with Attila in attendance.  Unfortunately, the shot of the right wing Gepids and Heruls was rubbish, so I deleted that one.
Not wanting to waste any time, the entire Hun army advances en masse.  The first photo of the action (above) is taken from the Hun left flank, as they move their cavalry detachment wide around the hill.  They spread one unit of horse archers into skirmish formation and trade shots with the Visigothic foot archers on the hill, which is all they can see for the moment.  The Hun commander here has realised that something is behind the hill - he just doesn't know what it is...
The centre, however, is nowhere near as neat and tidy, or indeed sensible.  Despite their initial caution, the Romans have advanced the Franks at full speed to cramp the style of the central Hun horse archers.  This has broken up their advance, and mindful of the time constraints they have advanced the rest piecemeal.  The Alans start to pick them off one at a time by charging in - hey, who needs bows anyway?
Back around the hill, the Visigothic cavalry have advanced to engage the Hun general and his nobles, while the Visigothic skirmishers have disappeared under a hail of arrows, taking a unit of Huns with them.  At the top of the photo you can see the glorious charge of the Ostrogothic cavalry as they crash into the Visigothic foot - does this count as a civil war?
And here they are in all their glory.
Off into the distance, the centre continues to be a mess.  However, the Franks have managed to find themselves on the receiving end of a huge Gepid warband.  Both sides fail to withstand each other's ferocious charge, and when the dust clears, half of the effectives of the Franks lie dead in a single turn.  Maybe it wasn't such a good idea to use them to face off the Huns after all...
A quick sprint to the far end of the field finds the Gepid foot archers merrily shooting Roman Equites as the menacing column of Gepid and Herul cavalry closes in.  Those watching with OCD will no doubt note that my Skutatoi have mysteriously been replaced with proper Late Romans.
Back at the infamous hill, Thorismund leads his second unit of heavy cavalry towards the Huns, taking a few shooting hits as he goes.  It is Turn Five already!
In the centre, the carnage continues.  Valamir angles his remaining heavy horse to try to help Attila in the centre.  The Huns are dying in droves, and they aren't taking enough Alans with them.
In fact, the Huns' ranks are thinning rapidly, although they do finally manage to catch some Alans at a disadvantage.  In the far distance, the Franks have disintegrated, shaking the morale of a legion.  Even though the centre is not going Attila's way, a morale collapse on the Roman left could swing it back again in his favour.  At the very far end of the field, the Comes Equitum has managed to get himself killed by the charging enemy cavalry.  However, this does not seem to bother his troopers very much; despite the high shooting casualties and the death of their leader, they shrug it all off and keep on fighting.  This is effectively the crisis point of battle.  The Huns are losing badly in the centre, but the Roman left is in disarray.
I manage to head off to the other side of the table to take this photo of the Gepids pressing the Romans hard.  Just off to the left of this shot, Sangiban has managed to get himself killed, but the rest of the Alans don't seem to care too much.
Dusk is now falling, as shown by the large yellow die.  The Hun sub-general on the flank with the hill is about to have a bad time...
A photo of the rest of the field at this point as the Hun army collapses.  They do manage to take that pesky legion with them, but it held out just long enough.  Overall, Rome wins by 11 points to 5.

I thought it went well; we managed to keep a dozen players going for over two hours.  The Gepids were unlucky against the Equites, failing to make enough of an inroad after killing the general there, and the left flank of the Hun army eventually came unstuck.  The centre was not nice.  The Romans more or less just held their position, not even bothering to take the hill; they probably reckoned that it would slow down any enemy rash enough to come across it, so why bother committing oneself?

My own feeling is that this represents the historical battle quite well.  The Huns don't need to attack on their left, but can simply mask the hill and use their firepower to shoot anything that rears its head.  The Ostrogoths can push against the Visigoths, especially if they aren't forced to move further into the centre.  The Huns themselves can probably just shoot in waves, although the players on Tuesday quite rightly felt that this wouldn't give them the time they need to win the battle.  And of course the Gepids can always do what Gepids do best and charge everything in sight.  It will be interesting to see how it plays again at Carronade; here's hoping we get a Hunnic victory this time, because that would show that the scenario and the mix of troops are rightly balanced.

Cheers, all!