Yesterday evening saw the latest game in our Empire Campaign, Macedonians defending against Persians. This is one of two major conflicts, the other being between Rome and Carthage.

The map shows the Macedonian deployment. I chose the army and set up. In previous battles, even when Macedonia has won, the sheer number of Persians has given rise to some scary moments. Given that one flank would be very open, I decided to try something I haven't done for a while, in an attempt to offset the Persian wave attacks. This explains why the Macedonian extreme right is deployed as you can see, with sacrificial light horse in front of the Companions, and an extra unit of light infantry in reserve just in case. I made the Companions one large unit of 18 figures to help absorb the expected damage, and I also angled the guard infantry behind the hill so that they could help out against the usual horde of Persian horse. The phalanx was in the centre as usual, with a whole load of light infantry on the refused left flank, helped by some rough ground. I played the Macedonian right and centre, while William was in charge of the refused flank. Gordon constructed and set up the Persians; he also played the main central command. Billy was on their right, opposite William, and David played on their left. I haven't shown their deployment because the numbers made it all a bit of a blur. Suffice it to say that their right was rather thin; their centre was composed of Kardakes and guard infantry, with a central cavalry reserve; and their open left flank had waves of all sorts of cavalry. The usual skirmishers were in the forefront of both armies.

All of the photographs are taken from the Macedonian perspective, because that's where I was. Up first we have the bulk of the Persian centre; I haven't shown their right wing, because it was relatively sparsely populated. On their right centre (the leftmost units as you look at it) are their infantry and reserve cavalry.
The second shot shows the cavalry on the Persian left wing, the open part of the field, with skirmishers aplenty in front.
Photograph number three shows the start of the game, facing the Persian right. There's not all that much here, because Gordon knew that their style would be cramped by the rough terrain in the foreground. It is already occupied in this shot by Macedonian skirmishers.
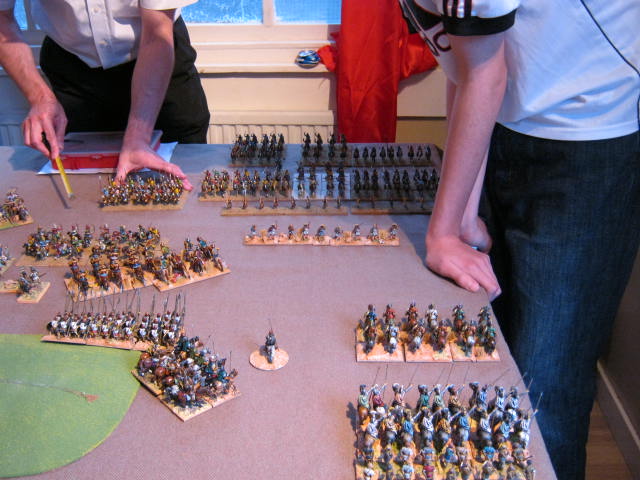
The situation more into the centre at exactly the same time. You'll notice that there is a bit of space here; this becomes important later on.
A longer shot of the centre and Persian left. In the foreground you can see the Macedonian guard infantry advancing from behind their hill. Immediately to their rear are the Thessalians, who are in position to move into the centre or right as the opportunity presents itself. The Persian horse on this wing stayed put because of the quality troops to their front, hoping to do enough shooting damage to even the odds.
The centre develops. Remember that space to the Persian right? As the Kardakes and friends advance in the centre towards the phalanx, the Persian reserve cavalry moves to fill the gap, hoping to crush the light infantry on the Macedonian refused flank and turn the phalanx.
At the same time, the Macedonians continue to advance their guard infantry, choosing to swing the Thessalians to the right to help out against the huge numbers of Persian horse here.
Back to the far side. Billy's initial shots against the Macedonians in the rough were superb, but this may in fact have been counterproductive as the situation stabilised, turning this wing into a stand-off. This suited William, because it meant that he was able to ignore Billy's troops in the meantime, as Gordon's cavalry column continued to advance.
And here they are. Unfortunately for the Persians, William's shooting became really effective at this point. In the right foreground of this photograph you can see the Persian guard infantry advancing on the hill. Just out of shot to the left rear of the phalanx is a waiting unit of Greek hoplites.
The same turn, more into the centre. The phalanx right in the foreground of this photograph has already taken some shooting hits, and will be facing the large column of Kardakes. To try to compensate, the two phalanx units to the right have come off the hill and both of them have slammed into a single unit of Kardakes on the level ground in ront of the ridge line. A major decision is pending here.
This shot shows the Macedonians advancing on their right. The reserve unit of light infantry is holding position to keep its options open.
A long table shot of the whole battle from the Macedonian left. I wanted to capture the essence of the moment at which major decisions are about to be made. I would have preferred to take it from the other flank, but there wasn't enough room!
Crisis in the centre as fighting rages all along the infantry lines. The central Kardakes column gives the weakened phalanx a real scare, but apart from that all the rest of the Persian infantry are in real trouble.
The same moment to the right of the phalanx.
The Macedonian right at the same time. The Prodromoi are in trouble, but the Companions are right behind them.
Another full table shot.
The Kardakes have crumbled as the two rightmost phalanxes keep going forward. You can also see the Macedonian guards advancing on the right of this shot, with the Armenian heavy cavalry to their front, the best cavalry in the Persian army.
The Thessalians have wheeled into line and advanced in tandem with the foot guards.
A third table shot. Just after this, the whole Persian army suddenly collapsed. William advanced his light infantry to hem in Gordon's cavalry column, which was hit in the flank by victorious hoplites fresh from wiping out the Persian infantry. On the right, the Macedonian heavy guard infantry and cavalry destroyed many Persian cavalry, and it was all over.


.jpg)


.jpeg)


.jpg)


.JPG)