On Tuesday we played the final game in Turn 9 of our Empire campaign. Although in our alternative universe the Persian Empire was not entirely conquered by the Macedonians, it has been reduced to a shadow of its former self. This is in part due to the Macedonian onslaught, but multiple rebellions have played a part too. The rump Persian state now controls only Parthia and Bactria. On Tuesday it tried to take Persia back from the current rebellion. We ruled that even though Alexander the Greatly Mediocre failed, the relative superiority of the phalanx system has been adopted by the various powers. This is a blatant fudge, for which we do not apologise. The reason for doing so is that we were getting a bit bored with the same forces of Achaemenid Persia fighting the Macedonians, so we have decided to use Successor armies from now on. The invading "Persians" used a Graeco-Bactrian army, and the defenders were Early Seleucid:
 |
|
William chose the attacking Graeco-Bactrians, in blue at the top of the map. He and Simon set them up. Simon ran the right wing, which consisted of a unit of 12 Companions and two units of 12 Bactrian Heavy Cavalry as the main contingent. Inside those towards the centre were four units of 8 Light Cavalry. Two were Persians with javelins and the others were Skythian horse archers. There was a large unit of 18 Indian militia grade medium horse in reserve. William ran the rest of the army. The centre was comprised of three Phalanx units, each of 32 figures in four ranks, staggered en echelon. A lone unit of 12 Peltasts was positioned to their inside flank, and three units of 8 skirmish archers screened the front of the phalanx. The left flank of the phalanx was protected by two units of 24 Indian massed foot archers, one of which was deployed in two ranks, and the other in three. The left wing of the army had an advance guard of light cavalry: two units of 8 Persians and a unit of 12 Skythians. Behind them was a unit of 12 Bactrian heavy cavalry and 18 Indian militia horse. In reserve on this wing was a unit of 12 Peltasts.
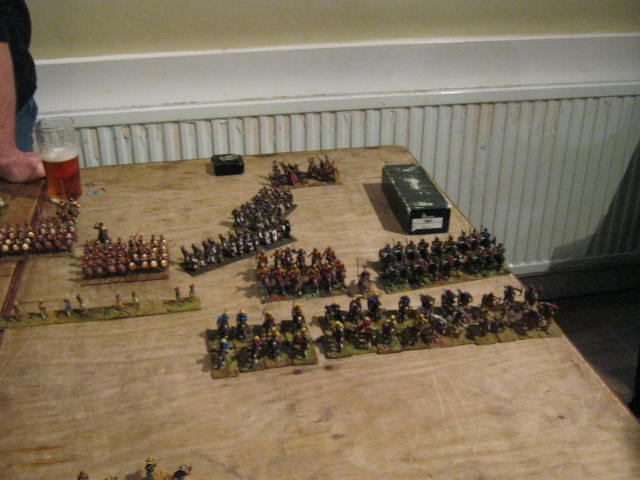
I chose and deployed the Seleucids. Since the terrain was mostly flat, with only one low rise in our centre, I went for a symmetrical deployment. Gus and Euan ran the left wing, which had 12 Skythians in three ranks and a unit of 8 local light horse with javelins. Behind those came a unit of 12 Companions, and to their inside was a unit of 12 Peltasts, a couple of elephants, another unit of 12 Peltasts, and a unit of 24 Argyraspides in three ranks. The right wing, which I controlled, was a mirror image. Gordon ran the central three phalanxes, each of which was 36 figures strong, deployed in three ranks. There were various skirmishers out front.
Since we were the defenders, all we had to do was hold for a draw, which is why I went for this deployment. I deliberately set up as far back as possible, hoping to do as much missile damage to the attacking loyalists as possible before contact. I was expecting the enemy to have quite a few elephants, and it was something of a surprise to see that they hadn't brought any with them at all. William had gone for a variation of the attack en echelon, leading with the left. Here the Indian infantry were positioned so as to move out and extend the infantry line while the cavalry charged home. Simon's wing had most of the powerful cavalry units, tailing off with skirmish-capable lights to take advantage of any gaps that might present themselves in the centre.
|
| Massed enemy cavalry advances on our left |
 |
| The enemy advances on my wing. Note the Indian infantry moving wide. |
 |
| My response is pretty much to hold my cavalry while shifting the elephants and Peltasts more to my right, followed by the unit of Argyraspides at this end of the central phalanx. The idea is to try to counter the enemy weight that is coming towards me. |
 |
| Move and countermove continue on my wing |
 |
| Above you can see developments in our centre and towards our left. A large melee has developed on our extreme left wing. Our phalanx angles in towards the enemy phalanx units, which have so far stayed put. In effect, the invaders are trying a double envelopment with their powerful wing forces while holding back in the centre as much as possible. |
 |
| The fortunes of war are even on our far left wing. Our elephants have broken through, but have no one else to their front. Our cavalry are being roughly handled, though, so the far left unit of Argyraspides moves wide to protect the left flank of the phalanxes. |
 |
| Our phalanxes continue to advance on the enemy. We have more weight, but they have firepower plus Peltasts on overlap to our left. This is going to be close. |
 |
| Back to my wing in the photo above. I have superior weight here now, but I can't unleash it until I clear the enemy cavalry. With one eye on the fierce fighting between the phalanxes, I decide that I need to choose my moment before I can hit the Indian infantry effectively. |
 |
| The fighting on our far left has effectively neutralised both armies' troops there. Well done to Euan and Gus for defusing the powerful enemy cavalry attack. The photo above shows the heavy infantry fight in what is now the centre , with my elephants poised to go into the Indians. The enemy cavalry on my wing has now been almost entirely destroyed. |
 |
| A final shot of our right at the point of attack |
As the phalanxes of both sides grind one another into the dust, my elephants charge into the Indians with great abandon, causing huge amounts of grief. I commit the Argyraspides as well, but the Indians just hold out and no more. Then the phalanxes of both armies start to disintegrate, and it's game over - a very honourable and bloody draw. Which means that, in campaign terms, the Persian loyalists fail to retake Persia proper. The club was the busiest I have ever seen it, so we had to make do with a smaller tabtelop than we should have had, and no mat. It was still a good game, though.


.jpg)


.JPG)


I'm not a wargamer myself, but I can enjoy seeing pictures of them. Mostly interested in the painted figures ;-)
ReplyDeleteLooks you had a good time :-D
Hi Peter, it was a very good game. The one problem we have is that the storage and gaming space at our club are both limited, so most of the time we end up playing on bare tables. I know exactly how I would construct the tabletop I want, but I don't have the space for it at home. The bareness does detract from the overall look.
ReplyDeleteCheers and thanks for looking
Paul
Much better with the photographs! Great battle report.
ReplyDeleteI know what you mean re: the table. We usually cover ours with a green cloth which seems to do the job.
Hi Phil, at least I remembered the camera this time!
ReplyDelete