Saturday, 23 December 2017

A New Blog

I've just started a new blog for a new game. Well, an old game really, because I'm reviving my fantasy role-playing campaign for my kids. In case you haven't noticed, my activity on here has gone down of late, mainly because motivation is sadly lacking. The first post on the new blog explains why here. I'm hoping that a new chapter in my gaming life will help to keep me going with my ancients, at least in terms of painting. If I'm painting figures for the world of Elric, then it's just a small step to reaching for the ancient Germans as well...

Sunday, 5 November 2017

On the painting table: November 2017

Slow, stately progress on another couple of Early German war bands; figs by Old Glory. Proof positive that I am still painting at times...

Monday, 9 October 2017

On the painting table: October 2017

More Early Germans - that is all. The start of semester this year has been even nastier than usual, so painting time is suffering...

Tuesday, 19 September 2017

Saying hello to Carl Packham

Hi Carl, thanks for looking in - and that's a great profile picture, by the way.

Paul

Sunday, 17 September 2017

Two more war bands finished

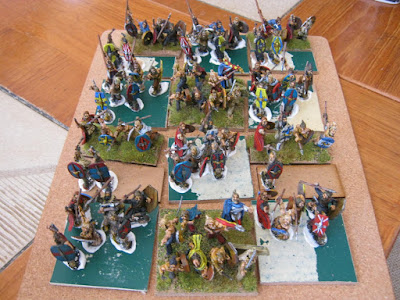
...which gives me five units of 48 figures, all Old Glory. I like the idea of an army composed of guys by the same manufacturer, it's not something I manage very often. Here's how they look in their storage box:
Not bad in work-heavy circumstances: 240 finished since May. It's a start...

Sunday, 3 September 2017

On the painting table: September 2017

Progress on the Germans. These are the latest shots of the war bands in progress.

A few more have materialised this month.
And here is the current state of the painting queue. Since I'm not playing regularly, keeping momentum isn't easy, so I've compromised on little and often. I'm aiming to finish three figures a day to keep the queue moving, which means maybe an hour and a half at a time. This is manageable, given all of my other commitments. It means that progress is slow but steady; but at least there is still progress...

Saying hello to Tony Emery

Tony has quite a list of interesting blogs to follow - just click on his profile thumbnail to find them. Thanks for joining, Tony!

Saturday, 26 August 2017

Society of Ancients Committee Meeting

On Thursday Roy and I took the train to That London for a committee meeting. While not perhaps the most riveting of reasons to pass through as little of the nation's capital as we could manage, it nevertheless had its highlights. Some swag:
And:
Both are available from the Society of Ancients webshop here: http://soa.org.uk/joomla/

Until now, my activities have mostly taken the form of editing the journal, which means a lot of email traffic. Not so much in the way of face to face communication, though, because time is tight. Cheltenham is a good location, and now that things are settling down at least a little I am hoping to be more able to take advantage - hence the trip to London. It was a good opportunity to meet people with whom I had only corresponded previously, and this is something I'm hoping to do a little more often. Now I just need to cover all of the playing pieces in Gladiolus with clear plastic and unleash my kids...

Friday, 4 August 2017

On the painting tray: August 2017

More Warband type German nutters:
These are coming along quite nicely. Originally, the intention was to keep the campaign going via email, but the Glasgow group has had a series of unfortunate health issues plus summer holidays, so nothing has been happening there. It's possible I might have enough Germans painted soon to play the next campaign battle myself, since I already have the Romans. Above shows the start I've made on the close formation warbands that make up the bulk of the forces; when these are completed, I'll have five units of 48 figures, and I'll need another three plus some other types.
This one shows the painting queue. From the left as you look at it there are some finished guys ready for basing, and then a production line of figs at various stages of completion. I used to paint in batches of six to eight figures at a time, but I've found that with work being so heavy I'm not able to commit to regular ongoing gaming. In turn, this means that motivation is dipping, not to mention time and available energy. The compromise is to paint three at a time, which produces an illusion of faster progress. It takes longer to get a full unit on the table, but I find that, psychologically, a quick turnaround of a smaller number of completed figures is now working better for me, because I can at least see some results reasonably quickly. Whatever works...

Sunday, 9 July 2017

Elite Scum Completed

Finished some sword-armed Early Germans:
These tend towards the wealthier end of the spectrum.
Shot from above shows the basing.
Here's how they look with some friends.
A slightly closer look at frothing loons. 28mm figures by Old Glory. So far that's 144 painted. Must do more - can't resist!

Saturday, 1 July 2017

On the painting desk: July 2017

More Old Glory Germans:
Two almost completed 24-figure elite war bands that can be combined to make a particularly large one, plus the start of the command stands for two 48-figure war bands. With any luck, I'll find time soon to complete the elites. I really only need to add a figure or two and gunge the bases...

Thursday, 29 June 2017

Great idea for pre-battle manoeuvres

Do have a look at this:

http://stracmark.blogspot.co.uk/2017/06/idea-for-future-wargame.html

Mark has posted this on his blog, which I am now following. It's a neat way to represent those times, especially in a campaign, where multiple forces need to try to arrive on the field at the same time. It could also be a really good way to simulate things like Mongol envelopments and so on - the possibilities are endless.

Saturday, 3 June 2017

On the painting desk: June 2017

Started two smaller war bands of 24 figures each for the Early Germans.
These are really wealthy, because they all have swords, so that must make them bodyguard/elite units. Most of them even have clothing too. These can also be combined into a large elite 48-figure unit with two command bases. Figures by Old Glory, shields by a variety of manufacturers.

Thursday, 25 May 2017

First two German Warbands

Finished two 48-figure units, the first of the ancient Germans. Figures by Old Glory. These will do for the Cimbric Migrations right through to the Marcomannic Wars, so pretty much three centuries then.
The intention was to make them look appropriately wild, helped by the variety of poses, clothing, shields and weapons.
Shields are a mixture of various types of transfers and basic hand-painted jobs.
For those with clothing (!) the colours are mostly muted, natural ones. Richer folks sometimes have posher dyes and some even have cloaks and/or swords.
This is what they should look like to their own general - moving away towards the opposition as fast as they can.
The last one is a bit blurry, but I hope it shows the basing style.

Saturday, 13 May 2017

Jugurtha versus Marius

Finally played Romans against North Africans. Jugurtha has engaged the services of a bunch of Gaetuli on the promise of looting his own country of Numidia, and also persuaded King Bocchus of Mauretania to lend his aid. The two African princes are hoping that a victory over the forces of Marius, combined with the pressure they know is being exerted on Rome from the north in the form of a huge Germanic migration will combine to drive the Romans out of North Africa for good. The armies meet in a typical area of North African plains with some scrub and rough patches.
First photo shows the right wing of the Roman army, from the African perspective. Marius knows Jugurtha personally quite well, and also has a realistic appraisal of what is needed to win this campaign. Historically, he engaged the services of local Numidians who hated Jugurtha after what he did to his brothers, because he knew that he would need some light troops to help negate the advantages held by the Africans; the legions could of course take care of themselves. I didn't have enough figures to show these, and besides things can be rather confusing when both sides have the same troop types, so I used Iberians to represent the light guys fighting for Rome. This is why the shot above shows Iberian light cavalry. Beside them are massed Roman horsemen, hardened by the campaign. Not only are these all quite tough, they are led by a certain Lucius Cornelius Sulla; it turns out that the degenerate aristocrat has a real flair for the military life.
Legionaries, with some auxiliary skirmishers out front.
Same again. Marius has four of the new-fangled legions drawn from the capite censi. This has made him a hate figure as far as the old nobility is concerned, but needs must during an enormous military crisis. The idea is that Marius will see off all opposition and can then  be disposed of in a good old-fashioned Roman manner. The scrub at the right of the photo is infested with Iberian light infantry, but they won't physically appear until spotted.
Facing the scrub above is the right wing of the African army, a mob of Gaetuli horsemen led in person by Jugurtha. These are very light, but have many javelins. The rough ground has many light infantry hiding in it.
The Gaetuli also have many skirmishers. I ruled that the tribesmen should all deploy together as a coherent force.
Nestling in the centre and deployed as far back as possible from the legions is the mass of Mauretanian foot, commanded by Bocchus. The idea is for the superior numbers of African skirmishers to wipe out their opponents and then pepper the advancing legions with enough missiles to wear them down to the point at which the massed foot might have a chance against them.
Finally, beyond some scrub, we have the Mauretanian nobility: superior light horse led by Prince Volux, son of Bocchus.
Side view of the whole field from Volux's flank: Rome to the left as you look at it.
The view from the other wing.
The action is opened with Volux advancing towards the Iberians fighting for Rome.
Skirmishers advancing in the centre. Marius is playing it a little cagey, waiting for the outcome of the initial moves.
Jugurtha advances his Gaetuli skirmishers along with the first wave of his light horse; he wants to scout out the scrubland opposite, which is partly hidden behind a giant carry-out tub aka dice tray.
The legions start to advance, now that their skirmish screen has been stripped away.
Those legionaries look very menacing indeed.
Jugurtha has found some lurking light infantry (top right of the photo).
A view of the whole field, from Jugurtha's flank.
And another, from the opposite side. Sulla has advanced his heavy horse just enough to force Volux to retire for fear of being hit hard.
Eventually Volux has to turn to face his tormentors; any further movement will result in him retiring off table, which basically means that he would be unable to stop the Romans doing what they want on this flank. In the meantime, both sides are expending many javelins.
The legions grind forward inexorably. Some of their men start to fall to the skirmishers, but not enough...
A more central view.
And the same towards the Mauretanian right centre.
On the right of the African army, the sky is darkened with javelins. The Gaetuli slingers are starting to give the endmost Roman legionaries a hard time.
Obligatory side view from the other end of the field.
Opposite view. The legions are getting a bit ragged under the incessant hail of sharp pointy objects.
Volux's cavalry are now in trouble.
The Roman advance is about to find out if anything is lurking in all that rough. At the top right of the shot you can just about see some of the third line of cohort from the endmost legion peeling off to watch that open flank. This legion is really beginning to suffer from the missiles.
Jugurtha's light horse continues to trade shots with the Iberians in the scrub. The latter are doing slightly better because of the partial cover.
The whole field again, from off to the flank of Volux.
The last photo: the full view from the other flank.

We started to run out of time, so I didn't get the chance to take any more, but basically the Romans dressed their lines grimly, as is their wont, in the face of continued missilery, and then crunched into the massed foot in the African centre. The Gaetuli light infantry appeared from their nice safe bit of rough and added to the discomfiture of the endmost legion, but alas for the brave Africans, it was not to be. Legionary grit did its usual job...

Many thanks to Will and Larry for playing Romans in their first game!

Monday, 1 May 2017

On the Painting Tray: May 2017

Made a start on a rather large Early German army. Figures are Old Glory 25mm:
My painting rate has speeded up slightly more recently, thanks to holiday weekends. These are the initial two of many war bands...

Saturday, 29 April 2017

Philippi Part 3

Finally. I have managed to squeeze time to sort through my photos from the final instalment of the big game from the Society of Ancients conference in October. Spring bank holidays - what a wonderful thing.
Above: the right wing of Antony's army: Numidians and lots of massed cavalry.
Moving in from the right wing, next up is an elite legion in duplex acies.
Then we have two legions in triplex acies.
And another two in triplex.
Towards his left wing, there is another elite legion in duplex.
His far left is composed of one unit of massed cavalry and some more Numidians. He he has gone for a symmetrical infantry deployment, with a cavalry-heavy right wing and a weaker left.
Unfortunately for the troops at Antony's left, Brutus has also gone for a strong right wing: all of his massed cavalry plus light infantry support.
 Next in the line is a couple of legions in triplex.
And another two in triplex.
The centre left of the Republican army has two legions in duplex, deployed en echelon slightly back from the main legionary fore - Brutus really is going to lead with his right.
His extreme left has a couple of units of mercenary Parthian horse archers, held even further back.
Above is a full table shot, taken from the right of the Caesareans, and from the left flank of the Republicans. Antony is on the left and Brutus on the right as you look at it. This one shows the relative weights of both sides, and gives a clear indication of Brutus' echelon deployment.
Another full table shot of the deployments, this time from the opposite end.
I was tasked with the left two legions and supporting Parthians of the Republican army. The action begins; most of the following pictures are taken from behind the Republican lines.
Movement in the centre.
The legions close at our centre right.
We already have combat at our far right wing - this is where Brutus is hoping to win the day.
A close-up of the developing cavalry melee here. The unit in the right foreground is Parthian, this time in massed formation; they are trading missiles with the Numidians at the top right as you look at it.
A full table shot from off to our far right after the first turn or so. You can hopefully see Brutus' echelon still in place, with me at the very far top left holding my thin red line back for as long as possible.
And here is the view that my legionaries have of the opposition.
My Parthians are doing their best to hurt the enemy cavalry, but there are just too many of them.
The enemy cavalry have angled inwards to put pressure on my leftmost legion. Cavalry are not likely to win against solid infantry in this period, but then they don't have to - the point is to weaken my infantry so that their legions can finish me off...
I am still trying to prolong the contact point.
A close-up of my Parthians in action. Time to evade, methinks.
The Caesareans have Celtiberian auxiliaries plus some Equites here against my legionaries.
A frontal shot of my guys. We are going to give a good account of ourselves. Note that the lines have closed up prior to contact. That's me at the back, waving them onwards.
Meanwhile, this is happening to the right of my forces.
Moving more to the right.
This is becoming a real grudge match!
The casualty counters are everywhere.
This one shows the far right of Brutus' legions, just at the point where they meet the cavalry command. The central cavalry unit is one of Roman Equites. Maybe there's a young poet called Horace in there somewhere.
The right punch is working, albeit rather slowly.
An angled shot at the same moment. The Republican cavalry are breaking through.
Another full table shot from our extreme left. My legions have still managed mostly to stay out of it at the very top left of the photo, but the enemy is closing.
A side-shot from my wing for a change.
My Parthians are falling back.
The superior weight of the enemy infantry has arrived.
The action to my right.
Success for the Republican cavalry.
The whole thing.
How it looks from my flank.
It's getting a bit nasty.
A desperate struggle just to my right.
And further along the line.
Antony's leftmost legion has quit the field, allowing some of our troops to start angling inwards.
Our right has been victorious.
However, my leftmost legion has given way, and my other legion is in trouble.
I'm in real trouble.
Casualties are piling up for both sides in the centre.
Our right is now very open, but in a very large battle it is difficult to exploit correctly. Just as this shot was taken, Antony's second leftmost legion managed to hold in with a high 'fates' roll, which means that it lasted a turn longer than normal. This was crucial.
A low-level shot of the centre. Both armies lost a legion here at this point, making the score two each.

At this point, my last legion and the leftmost heroes of the Caesareans both broke, making it three each. The next army to lose a legion would lose the battle, and unfortunately it was the Republicans, as another central legion gave way under the pressure. Another historical result, then, with Antony shading it over Brutus.