The Thousand Suns Campaign Loop
-
The Thousand Suns Campaign Loop by James Maliszewski
What the Second Edition Aims to Do
Read on Substack
7 hours ago


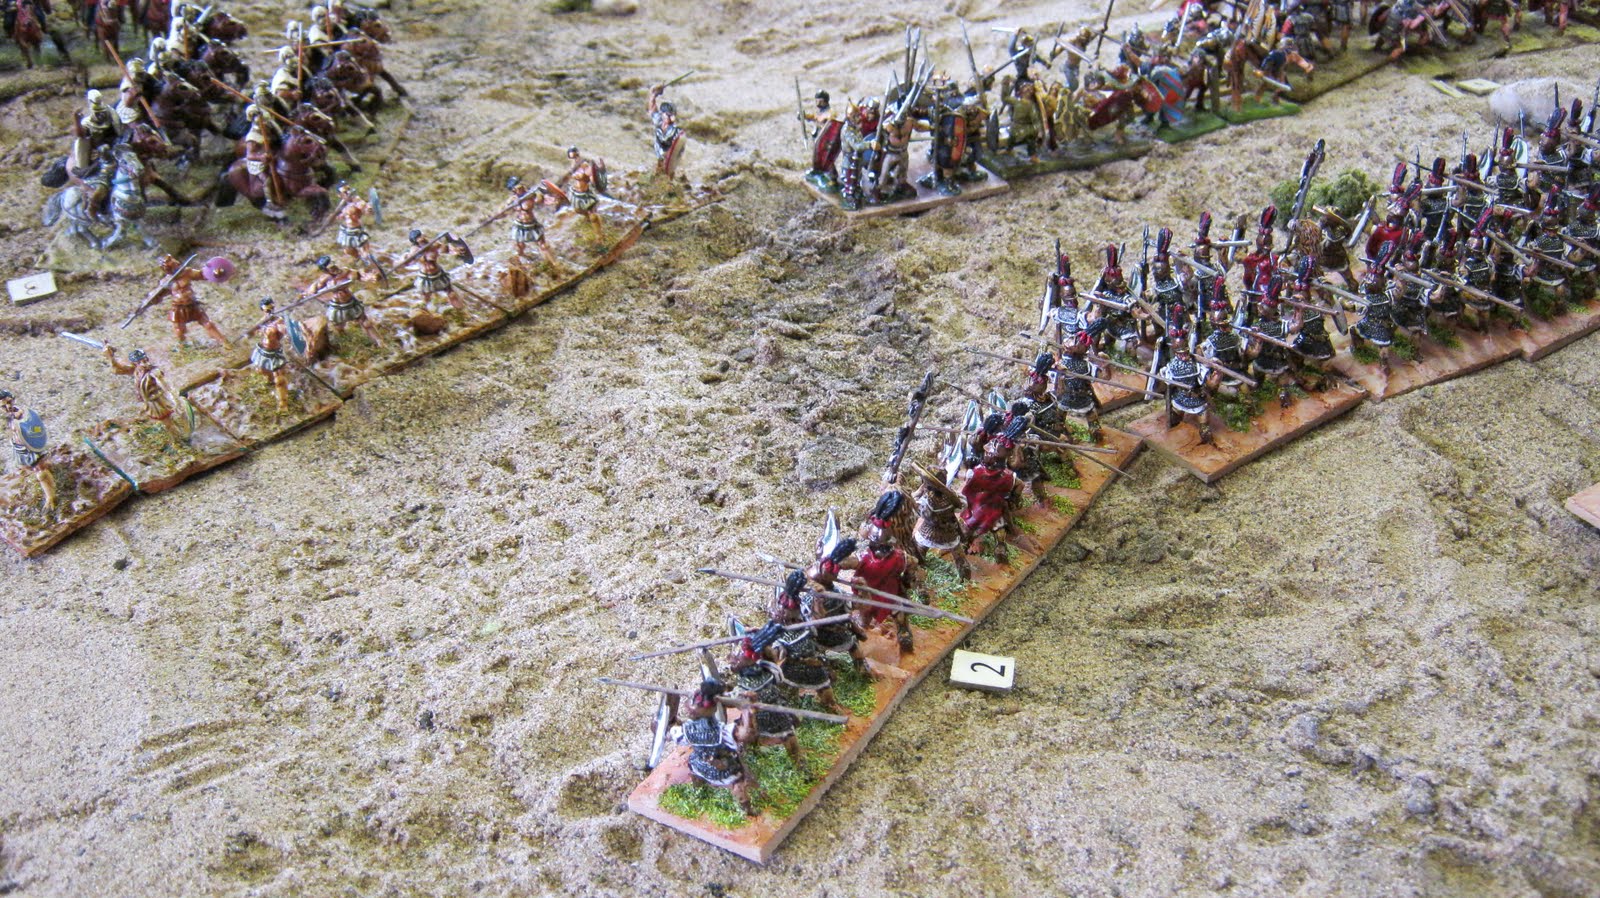
 This post shows the second half of the battle for Sicily. It is stalemate all across the front, except on our (Sicilians, in blue) right flank. Here the Numidians are beginning to press in on the flank of our Peltasts. In the left centre, our general has joined our leftmost unit of Hoplites, anticipating the demise of the Italians to their right, in the hopes of shoring up the Hoplites' morale.
 The second image shows various units being destroyed on both sides. Our commander-in-chief has failed to stop the rot as the leftmost Hoplites go disordered due to a failed morale test on seeing a unit of Italians break. This means that the Hoplites will be unable to exploit the demise of the enemy to their front, leaving it up to the leftmost Italians to try to come round on the flank of the Gauls and Carthaginian heavy infantry. On our extreme left wing, the Carthaginan heavy cavalry have finally managed to struggle through our first wave of units, partly exhausted.
 The third map shows the Carthaginian cavalry in trouble against our left wing supporting trooops, and the Italians moving into position to threaten the flank of the Gauls. On our right wing, the Peltasts finally disintegrate. It's going to be very close; the large unit of Spanish is itself starting to degrade as a result of continuous pressure in combat.
 Now the Gauls break, and the rest of the enemy cavalry are in trouble. Both units of Gallic heavies failed on two occasions to retire in front of our advancing second wave, and are about to pay for not obeying the order. On our far right, John's skirmishers continue to enact a toll on the Numidians. He even manages to start hurting one of the elephant units.
 On our left, we destroy both Gallic cavalry units, while losing our second unit of light cavalry. The Italians just don't quite reach the flank of the Carthaginian heavy infantry, and the rest of our centre collapses. John's heroic Rhodians and Cretans destroy more Numidians and a unit of elephants but it's game over, as Carthage wins by four figures.
 This is the first of a pair of posts describing the Carthaginian invasion of Sicily. Simon constructed and deployed the Carthaginian army (in red above). Their right wing was composed of:
In the centre was massed their heavy infantry:
Their left was composed of:
Simon played their right wing and Mark the left; they shared command of the centre. I constructed and set up the Syracusan army. Our left (me in charge):
Our centre (Billy in command):
Our right (John):
The battle began as follows:
 This was John's first visit to the club, and his first taste of the rules. Rather than mess him around with too much information, we thought it would be a good idea if he were to take the Sicilian skirmishing right wing. This would give him a good view of the whole battle as well as introducing him to the game. He immediately started to use his skirmishers to devastating effect, keeping them out of range of the enemy javelinmen and shooting them up quite happily. In our centre, we wheeled our infantry and started to advance them; on the left, we began to push forward with our mixed bag of light troops and medium cavalry. The Carthaginians advanced their infantry centre as well.
 The third image, above, shows the advance of the entire Carthaginian army, with some of their heavy cavalry peeling off to face our potential flanking movement.
 The fourth map shows the initial contacts. The Carthaginians were planning to use their large central infantry units to win through, while masking them with a large number of small cavalry units and elephants. On our left, the performance of the Carthaginian heavy cavalry was miserable, much to our relief. Unfortunately, however, one of our Italian columns was caught by a ferocious Gallic warband charge, rendering our centre immediately vulnerable. To our right, John sent in the medium horse at an angle to inflict as much damage as possible on the Spanish Infantry before being crushed themselves. His skirmishers were meanwhile continuing to enjoy themselves immensely.
 The final image shows stalemate across the entire front as most of the Carthaginian army ground to a halt, inflicting very little damage at all. Our left and centre continued to hold firm as a result. The only real movement was the large mass of Carthaginian troops on their left, although half of their skirmishers were by now defunct.
 First photo: on the Roman right, the Triarii take care of the impudent City Militia. A lone unit of Hannibal's veterans charges the Principes. The next photo shows the situation at the other end of the field, where the veterans of Hannibal's campaigns line up against the weak Socii legion:
 But it is all to no avail. The Carthaginian centre crumbles and the Triarii gang up on the lone veterans at the far end:
 For Falkirk we will tweak the Roman pilum rules and upgrade the City Militia to Veteran, although still equipped as Medium Infantry. We want to get the game to a very close match when the Carthaginian third line goes in, so a couple of incremental improvements should help to do that. Let's see if Hannibal wins next time.
 Towards the Roman right wing, Triarii clash with Militia, and Hannibal's veterans move up to attack the Principes. To the right of this first picture, the surviving Numidians under Masinissa stay out of range of the remnants of the Balearic slingers. Tychaeus did well to get a draw here. Next photo: the last unit of Carthaginian cavalry has a bad time against the Triarii:
 Finally, the lines meet. What looks like more Carthaginian infantry to the top left of this photo is actually their destroyed units. At the bottom left of the picture, the rightmost of Hannibal's veterans can be seen lagging behind the rest of their compatriots:
 In the first photo (above) the Romans contact the Carthaginian City Militia. Not enough damage has been done to the Hastati, so the Carthaginian third line is apprehensive. Below: on the far left of the Roman line, the Triarii have seen off one unit of enemy cavalry, and another is about to be caught by more Roman infantry:
 On the far right of the Roman army, the lone unit of City Militia is about to meet some Triarii of its own:
 Switching back to the Roman left rear, the wide ranging Carthaginian cavalry meets the second unit of Triarii. Good job the Romans moved them there, but this legion as a whole is now vulnerable to frontal attack by Hannibal's veterans:
 First, though, the Romans deal with the other unit of cavalry:
 Although we didn't know it at the time, the action in the photo above was crucial to how the battle turned out. The last of the Roman heavy cavalry has been destroyed, but the Carthaginian horse has got itself into a muddle in pursuit. This has given the leftmost legion time to move out some Triarii and deploy them into line. This is a risky thing to do because the main infantry fight is not over; indeed, Hannibal's veterans have still to enter the fray. It removes the important third line from this portion of the Roman army. The Romans decide to take this action because otherwise the Carthaginian cavalry will get time to recover its formation, and flank the entire Roman left. Which would be a disaster. The Carthaginians are well aware of this, so they have started shooting up the Triarii with the remnants of their skirmish infantry, the Velites having been chased off. Meanwhile the Hastati on the other side of the field are handily disposing of the Celtiberians. This shot shows gaps appearing; it is taken from behind the Carthaginian lines:
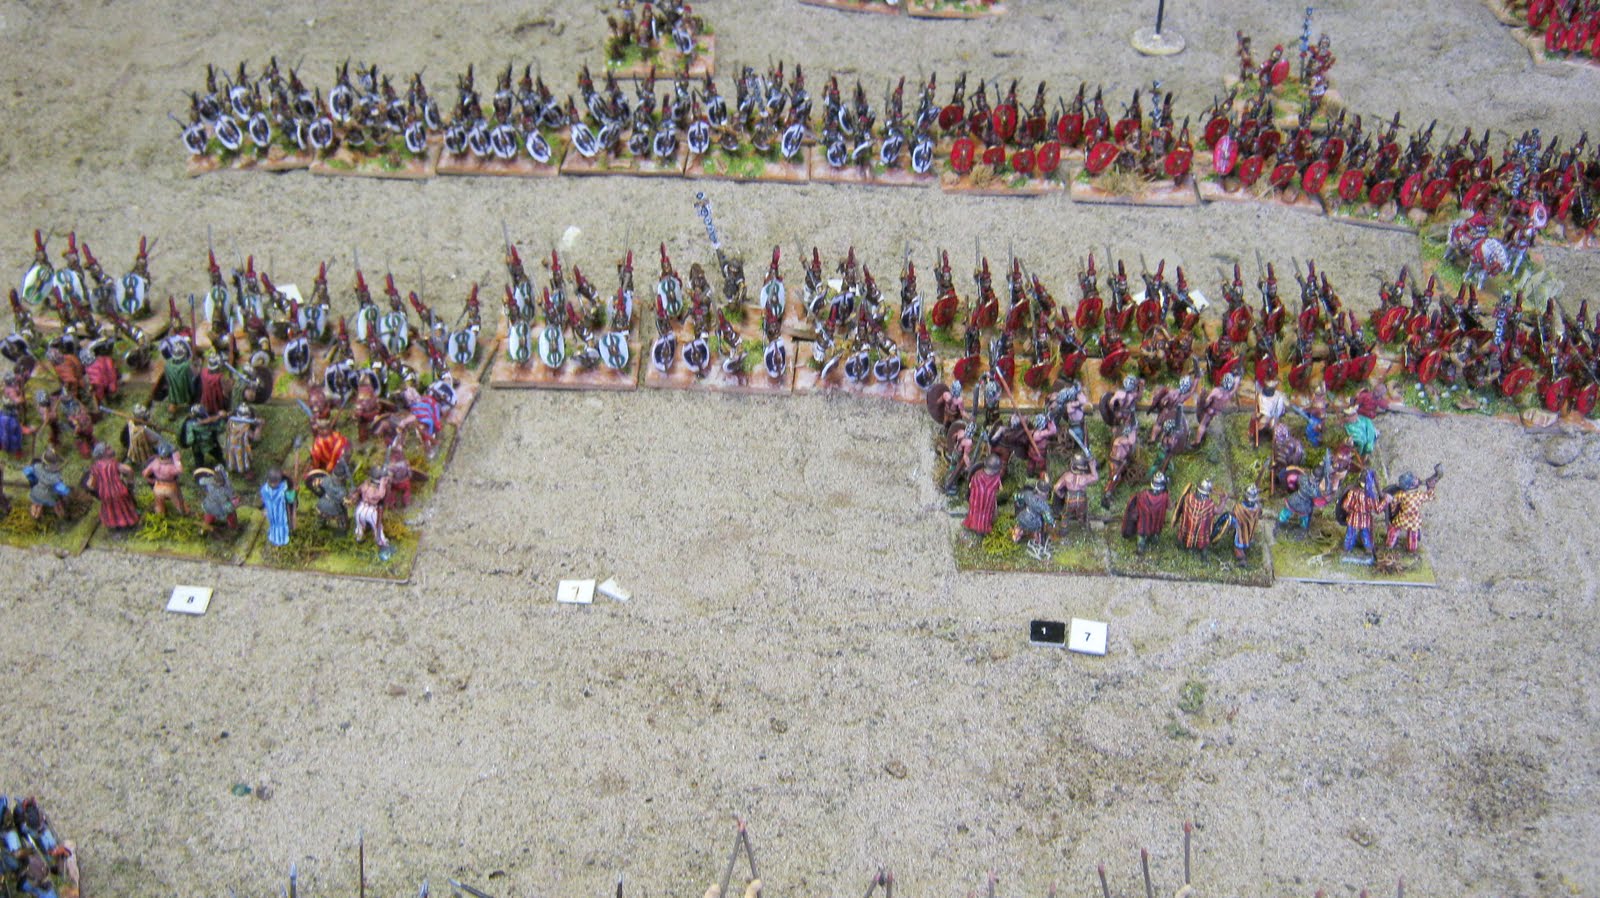 Next up is a picture of the same area, slightly more to the left. Some of the City Militia have moved out to counter the Roman Triarii we saw going wide earlier. This is not something I intended to happen, but I was at the other end of the table and it was too late to do anything about it. Sub-commanders not doing what you expect! The figures in this unit are some of my old Italians, pressed into service as militia:
 The next photo returns to the intense action on the Roman left. The Triarii are doing their best to press the Carthaginian horse, but one unit has nevertheless managed to ride wide around the Roman left flank:
 The Romans again counter by moving the rest of this legion's Triarii to the left. This legion now has no third line at all:
 The heavy cavalry mix it in the photograph above. The Ligurians and Celtiberians go into the Hastati, who have all recovered their order by now. Note the distinct lack of elephants by this point:
 The Roman heavy horse does what Roman cavalry usually does, and loses in style:
 Billy's tape measure of destruction points to a large gap blown in the centre of the Carthaginian first infantry line by the Hastati:
 The Numidian combat resolves itself. Neither side has much to show for it:
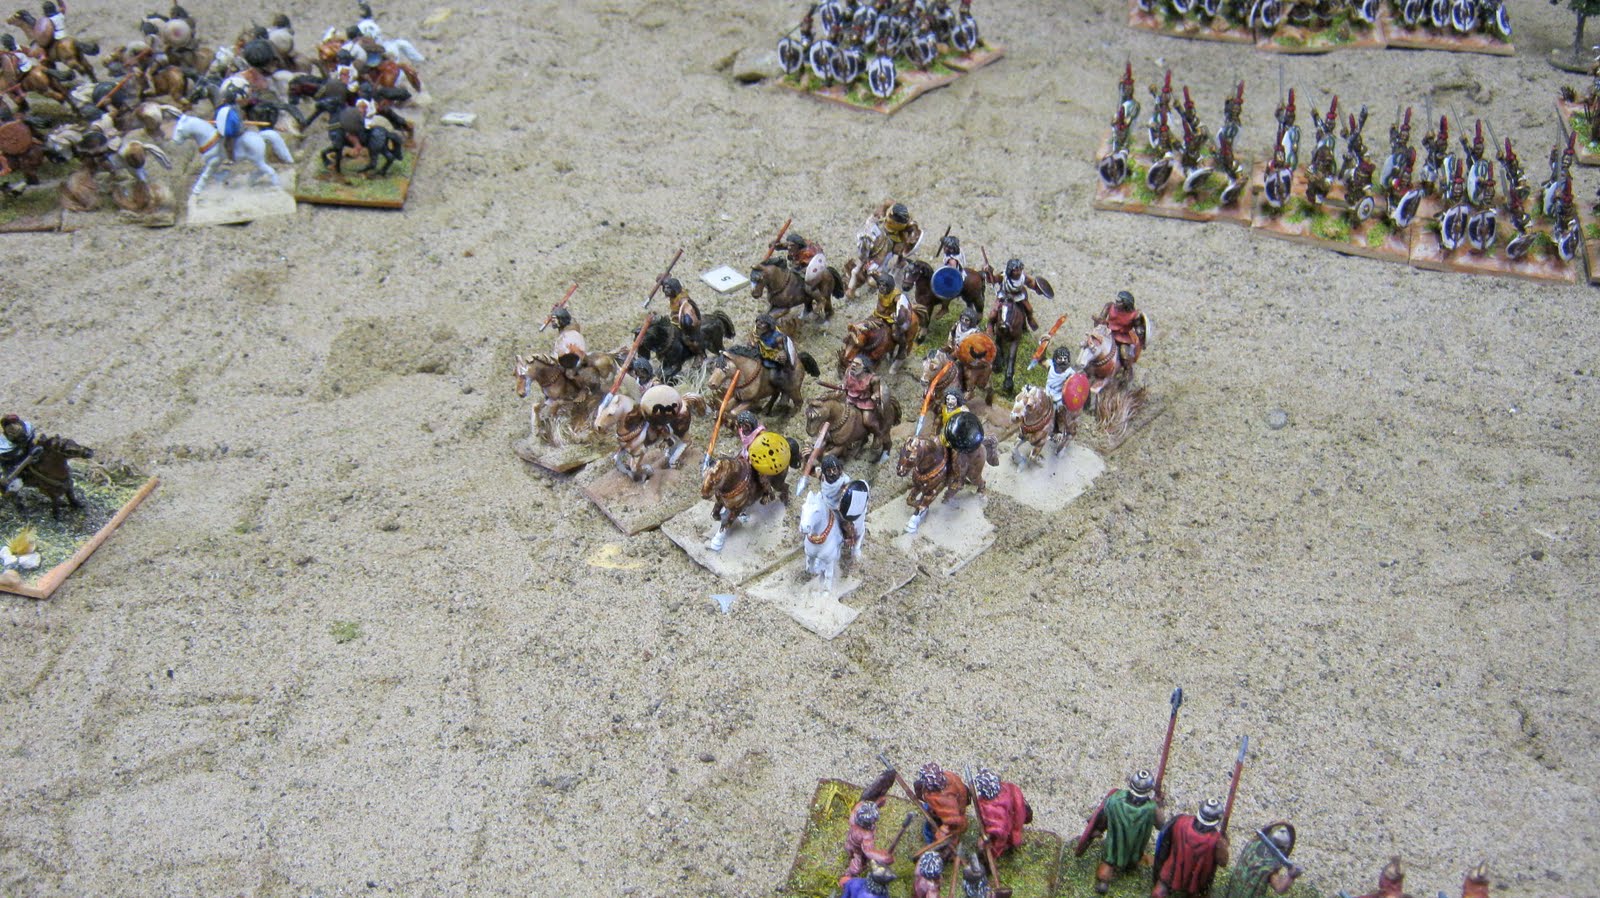 And yes, that is a column of Triarii moving out on the wing behind Masinissa; you can just see them at the top of the final photo.
 Things move on apace as the Carthaginian infantry lines advance (above). Next photo: the loan routing elephant disorders some Hastati.
 The remaining elephants approach the Roman lines, bloody but intact. They won't last long, though. At the same time, the Hastati and Principes shake out into line:
 The fast and furious melee between the Numidians continues:
 And on the opposite wing, both armies close with their heavy cavalry:
 Above: the Carthaginian infantry spaces out into the familiar three lines. Below: the Celtiberians continue their advance. One lone unit of elephants looks as though it might meet some Romans:
 The third photo is of the swirling mass of Numidians. The elephants that threatened Massinissa have been efficiently dealt with by the Velites:
 Remember the elephan that was caught between the infantry lines? A random roll saw it surge towards the Romans, who had deployed their Hastati into line, thinking they were safe. A close- up, this time:
 As the main body of the Carthaginian centre advances, and most of the elephants have been wiped out, the Carthaginian heavy cavalry picks up the courage to take on the invaders:
 In the shot above, the Carthaginian right wing cavalry have all successfully retired to reform. The shot below is of the other flank. One unit of elephants is moving out to threaten Masinissa's Numidians, forcing them to break up their advance. This gives much needed respite to Tychaeus:
 Another shot of the same location, this time from behind the Roman army:
 Meanwhile, the Celtiberians begin to trundle forward, preparatory to launching their charge:
 In the Carthaginian centre right, a lone elephant runs around in circles after the Velites kill all of its friends:
 I really do need to paint up the elephant casualties made by Simon Miller (aka Big Red Bat - see Blog List to the left).
 In the first photo, above, the heavy horse on the Carthaginian right retires, albeit piecemeal. In the next photo, the Romans begin to advance their own heavies. The centremost unit has dropped back, a bit wary of advancing Carthaginian elephants (which you can just see at the top right of the shot):
 Next up is a long-range picture of the elephants and skirmishers beginning to close:
 Meanwhile, on the Carthaginian left, Tychaeus advances bravely in the face of overwhelming numbers, and Masinissa follows suit:
 The Velites start to score hits on the elephants:


.jpg)


.JPG)
